
Tender, fall-apart braised short-ribs in a rich, flavorful sauce are so good over fluffy ricotta gnocchi…THIS is going to be your favorite cold weather comfort food!

I Have A Weakness For Braises
Something about the way they magically transform tough, humble cuts of meat into fall-apart fork-tender morsels combined with the deeply layered flavors that only time and low, gentle heat can nurture and develop. And then there’s the way they fill the house with the most mouthwatering aromas… ALL. DAY. LONG.
Ahhhh the anticipation!!!
Slow food, and braises in particular, are probably my very favorite things to make…and as the weather turns colder and the days get shorter the pull of chopping and stirring and browning and simmering in a cozy kitchen becomes impossible for me to resist. When my daughters were little and I was home during the day, dishes like these braised short ribs were weekday fare. Later, they became something reserved only for weekends. And now, with so many of us working from home, it’s not out of the question to make these in the middle of the week again (and really…think about how much more enjoyable that Zoom meeting or those spreadsheets will be as the seductive aroma of beef short ribs braising gently in a rich, red wine tomato reduction surrounds you).

What’s to love about this dish?
- The total time for this recipe is about 4 hours, but your actual hands-on time is considerably less
- Dried porcini mushrooms, Worcestershire sauce and anchovy paste give it that rich, savory, umami flavor you can’t quite put your finger on
- This is comfort food at it’s best, perfect for a cozy family dinner and special enough to serve company
- If you’re making homemade gnocchi, you can get them ready while the ribs cook or make them up to a month ahead, freezing until ready
- The combination of tender short ribs and rich, velvety sauce over pillowy-inside, crispy edged gnocchi is sheer heaven in a bowl
- This is also wonderful made ahead and refrigerated overnight so the flavors can develop (reheating directions in recipe notes)
Before We Get Started
Because braising is my very favorite way to cook, I have several more braises on this blog that might interest you… click on the photo to go to the recipe 🙂


… But back to THIS recipe…
What IS braising?
Braising is searing larger, tougher cuts of meat with dry heat, combining with sauteed aromatics, and then cooking, covered, low and slow partially submerged with flavorful liquid until the meat becomes meltingly tender.
This is different from stewing. Stews use more tender cuts of meat (smaller and even in size), that are completely submerged in liquid while they cook. Stews generally take place on the stovetop and braises start on the stove top but are transferred to the oven to complete cooking.
Do you need special equipment to make braised short-ribs?
The short answer is no. I use a cast iron enamel dutch oven and an immersion blender for this recipe. But you CAN make it without them.
Technically, you can braise successfully in a heavy stockpot, roasting pan or casserole dish with a tight fitting lid. So don’t worry if you don’t have a dutch oven. The important thing is to use something heavy and to have a tight fitting lid. However, dutch ovens are a game changer for any recipe that requires long, slow cooking and they produce the most wonderful consistent results. I prefer enameled cast iron because it’s easier to clean, doesn’t react with acidic ingredients and it looks beautiful. These pots can be pricey, but don’t let that deter you! I found my first dutch oven at TJ Maxx for a steal! They have them all the time so just start watching (or add one to your Christmas wish list!). They’re a great kitchen investment!
It Starts With A Good Sear
Select good quality bone-in shortribs and season ahead generously with kosher salt and cracked pepper. Get the pot hot, add oil, and begin browning the ribs. Do this in batches so that they aren’t crowded.

The beauty of a good braise is the care you take in the beginning to really develop the flavors.
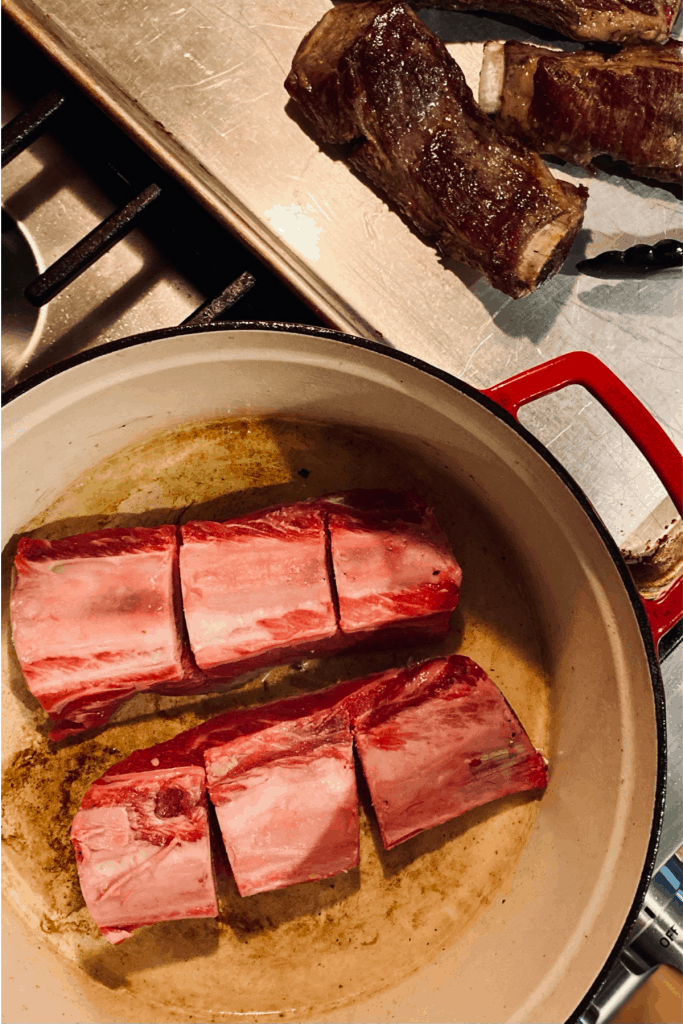

Take your time browning the meat on all sides. It’s tempting to turn them too soon, but resist the temptation. They’ll let you know they’re ready to turn when they easily release from the pan- if they’re sticking at all they’re not there yet.
Once the ribs have developed that beautiful brown color it’s time to set them aside and add the mirepoix to those gorgeous bits that should be hanging out on the bottom of your pot.
What is Mirepoix?
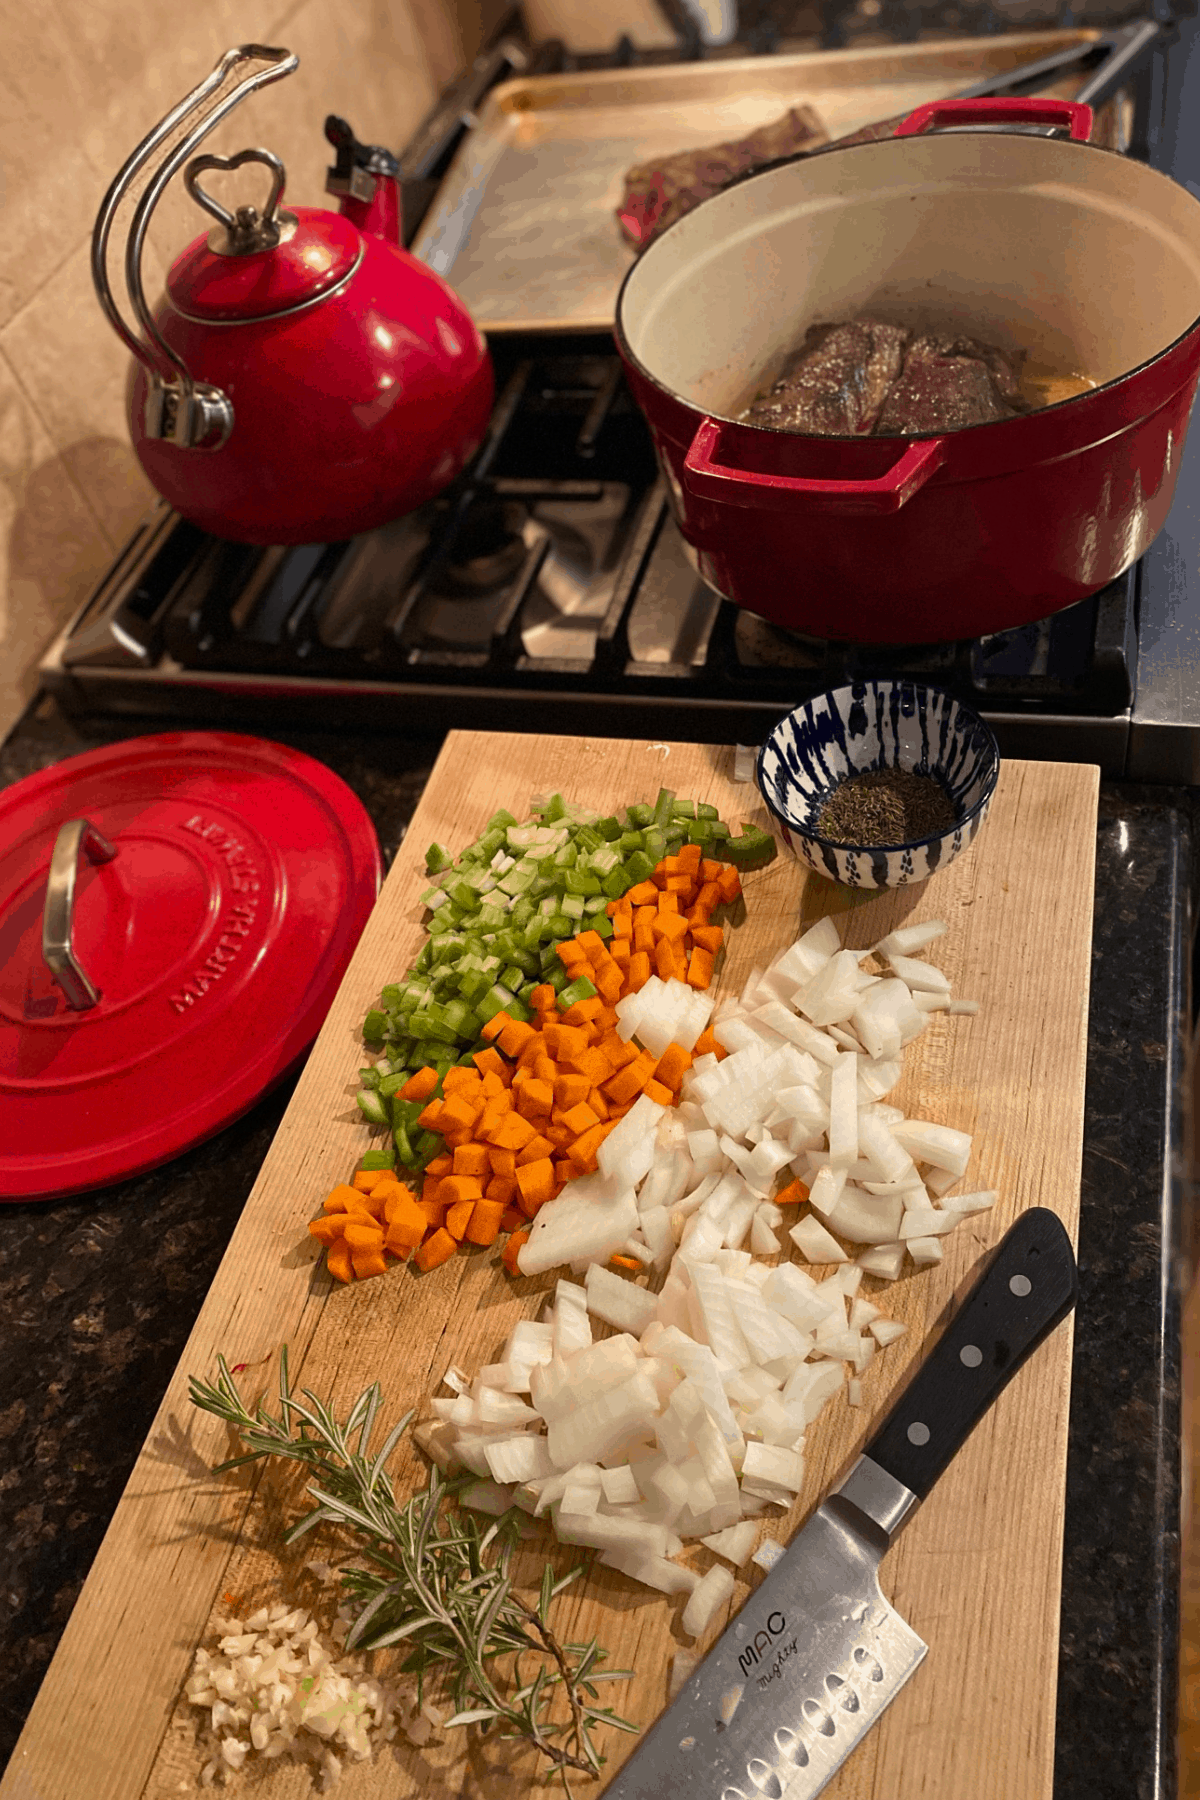
Mirepoix is a fancy word for diced carrots, onion and celery and is the base for many soups and stews. Generally, it’s 1 part celery and 1 part carrots to 2 parts onion. You can prep your mirepoix while your ribs brown. Once your mirepoix is soft and the onions are translucent (we’re not going for brown here) we’ll add the garlic and give it a good stir just until it’s fragrant (garlic can burn easily which is why we add it after the other vegetables).

Next, push the veggies to the outside edges of the pan, creating a clear spot in the center to add your tomato and anchovy paste, and stir constantly for one minute before stirring into the rest of the vegetables.
Deglaze Your Pan
Next, deglaze the pan with your wine, scraping up all of those good bits that have developed on the bottom. Let it reduce a little bit to concentrate the flavors, return the ribs along with the broth, mushrooms and tomatoes, put on the lid and place the whole thing in a low oven.

Now, go on with your day enjoying the warm, comforting smells wafting through your house.
A few words on anchovies, wine and dried mushrooms
- Anchovy Paste- If you haven’t cooked with anchovy paste before it might seem odd and you might be tempted to skip it. I encourage you not to! It adds a beautiful depth and complexity to the final dish that isn’t fishy at all. It’s that savory something that makes you go “mmmmm”. Anchovy paste can be found in most grocery stores in a tube next to the tomato paste. It’s good for up to 6 months when refrigerated. You’ll find yourself adding a little to all kinds of things once you have it. Soups, stews, tomato sauces. If you like Caesar salad it’s a must for the dressing. Trust me on this 🙂
- Wine- If you don’t consume alcohol you can sub beef broth and a tablespoon of vinegar for balance (I’d use red wine vinegar or balsamic). If you DO drink wine I suggest using something you’d enjoy drinking. Full bodied and dry (not sweet). A cab, pinot noir or merlot work beautifully. I used a blend we really enjoy called Upshot (about $15). Please avoid “cooking wine” as it’s usually bad wine with extra salt.
- Dried Porcini Mushrooms– This is another ingredient that adds that can’t-quite-put-your-finger-on-it-mmmm-factor. Dried mushrooms are wonderful to keep on hand because they have a long shelf life and their flavor is very concentrated. Reconstitute them by pouring 2 cups of boiling water over and letting them sit for about 15 minutes. You’ll use the mushrooms AND the soaking liquid here but be aware that there will be some sediment on the bottom that you don’t want in your sauce (it has a gritty texture), so carefully avoid pouring in the last 1/4 inch of liquid.
Once your ribs have cooked to meat-melting perfection you’ll remove them from your sauce and cover to keep warm. Next fish out any bones or whole herbs that are in your pot. Puree the sauce, off heat, until it’s nice and smooth. It should be thick already but I like to let mine simmer a little longer with the lid off to reduce even more.
Do You NEED An Immersion Blender?

This recipe uses another tool that I find myself reaching for over and over- an immersion blender. If you don’t have one you might want to add it to your Christmas list right under dutch oven. I LOVE, love, love my immersion blender! I use it for everything from soups and sauces to mashed potatoes and salad dressing. The beauty of the immersion blender is that you can use it right in the same pot you’re cooking in. No need to transfer your soup in batches to a blender or food processor (which can be messy, time consuming AND means more dishes to clean up). That said, if you don’t have one don’t worry! You can use a blender or a food processor…people were successfully making sauces long before immersion blenders were invented 😊
What should you serve with Short-ribs?
- I love this served over my ricotta gnocchi, but store bought gnocchi, polenta, mashed potatoes, cauliflower puree or pasta (papparadelle is fantastic here) are also wonderful options
- Complete your meal with a big green salad (how simple is that?)
- And sip the rest of that bottle of red wine you used in the sauce (if you didn’t finish it while it was cooking)
The final touch
Start a pot of salted water boiling for the gnocchi.
While water is heating separate the meat from the fat and bones and pull the meat apart into small chunks or shreds. I prefer chunks. Return meat to sauce and cover. Turn off the heat.
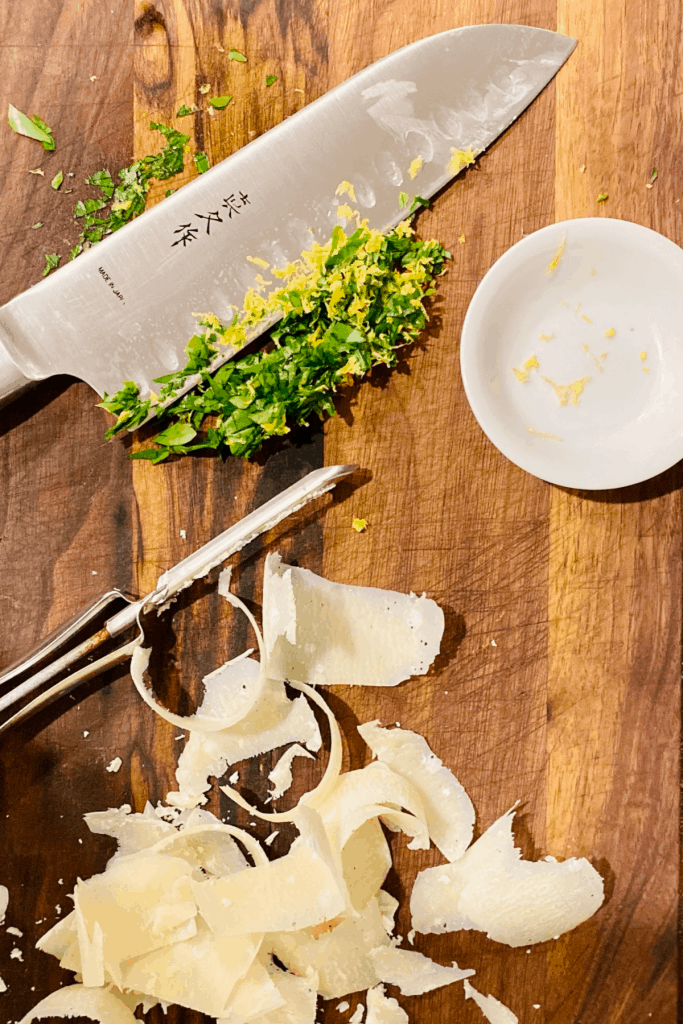
Chop a few sprigs of fresh parsley and combine with lemon zest. Shave some parmesan cheese with a vegetable peeler. Set aside.
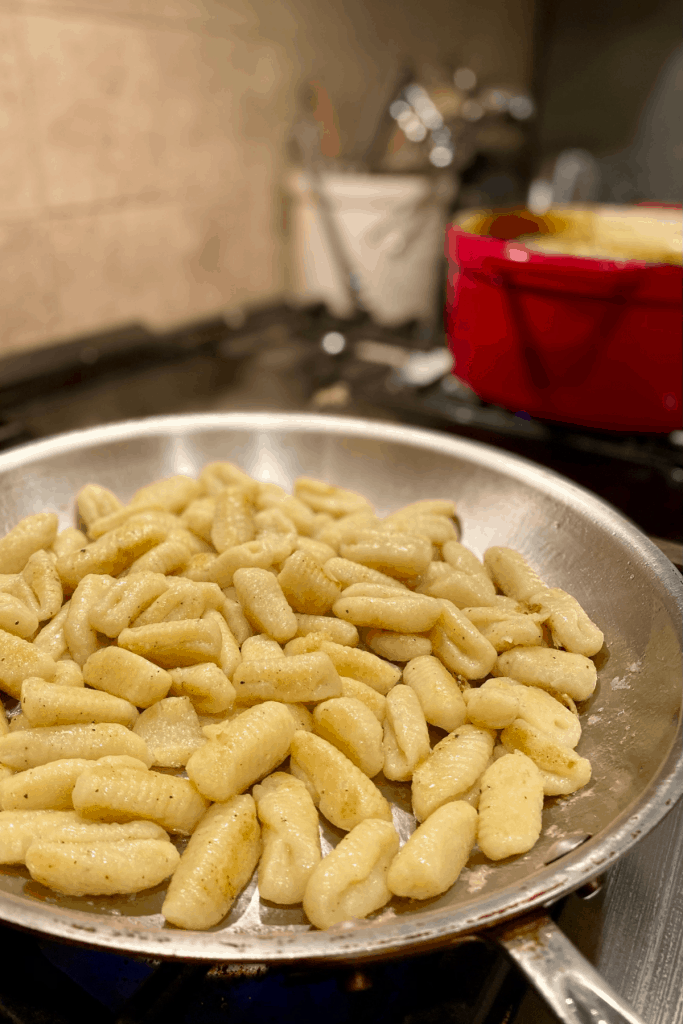
Boil your gnocchi per directions and drain well. Sauté your boiled gnocchi in a little butter and olive oil just to crisp the edges.
Portion gnocchi into bowls, top with a hearty serving of short-ribs and sauce and top with a sprinkling of parsley, lemon zest and parmesan cheese.

Close your eyes, breath in the delicious aroma coming from the bowl in front of you. Take that first bite and enjoy… wasn’t it worth the wait?
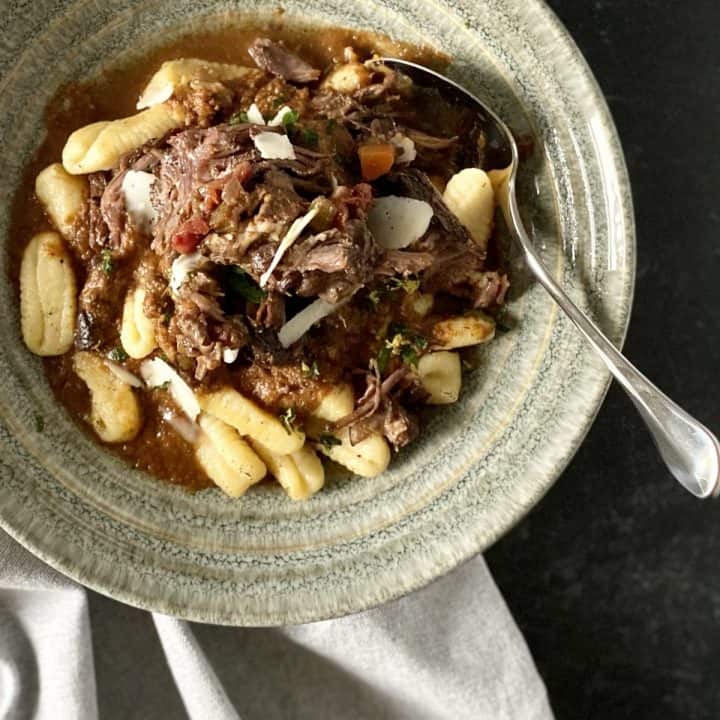
Braised Short-Ribs With Gnocchi
Fall-apart-tender short ribs in a velvety wine-tomato sauce over pillowy-inside crispy-edged gnocchi makes for the perfect cold weather meal
Ingredients
- 4 1/2 pounds bone-in beef short-ribs (do not use boneless)
- Kosher salt and fresh cracked pepper
- Ricotta gnocchi
- 1 oz dried porcini mushrooms
- 2 Tbsp oil (I use avocado oil, use something with a high smoke point)
- 1 large onion, diced
- 2 medium carrots, diced
- 2 stalks celery, diced
- 3 large garlic cloves, smashed with the side of a knife, peeled and chopped
- 3 Tbsp tomato paste
- 1 Tbsp anchovy paste
- 1 1/2 cups dry red wine (cabernet or pinot noir are good choices)
- 14 ounce can diced, fire roasted tomatoes with juice
- 1 Tbsp dijon mustard
- 1 Tbsp Worcestershire sauce
- 1 tsp EACH dried thyme and dried oregano
- 2 bay leaves
- 2 sprigs fresh rosemary, one left whole and one with leaves chopped
- 2 sprigs fresh thyme (optional)
- 4 cups chicken stock (bone broth if you have it)
- Fresh parsley
- Zest of one lemon
- Shaved parmesan cheese
Instructions
1. Season ribs generously with kosher salt (do not use table salt) and cracked pepper. If possible do this a few hours before cooking (the day before is even better) so that the seasoning gets deep into the meat.
2. Preheat oven to 300. Soak the mushrooms in 2 cups boiling water.
3. Heat oil over medium heat in heavy large pot (preferably a Dutch oven) until shimmering. Add ribs and brown well on all sides. You'll have to do this in batches, do NOT crowd the pan. Resist the urge to turn them too soon, they'll release easily from the pan when they're ready. The browning step is where you're developing much of the flavor. Remove to a plate and set aside when they're done.
4. While ribs are browning dice all of your veggies and portion out remaining ingredients so that they're ready when you need them.
5. Leaving 1 Tbsp of fat in pan, sauté your onions, carrots and celery, stirring often until soft and onion is translucent. You don't need to brown them. Add garlic and stir constantly just until fragrant.
6. Push vegetable towards outside edges of pan, leaving space in the center. Add anchovy paste and tomato paste to center and stir constantly for about 1 minute, then stir into vegetables.
7. Add red wine to pot, stirring to release all of the brown bits from the bottom of pan, to deglaze. Cook until liquid is reduced by about half.
8. Add tomatoes, Dijon, Worcestershire sauce, dried herbs, chopped rosemary, whole rosemary and thyme sprigs (if using), broth, mushrooms with soaking liquid (except for the last 1/4 inch where the sediment has settled). Stir well to combine everything.
9. Return ribs (and any juices accumulated on the plate) to pot. The liquid should nearly cover them.
10. Cover the pot with a tight fitting lid and place in 300 degree oven for 3- 3 1/2 hours, until the ribs are fall apart tender. Resist the urge to check them before the three hour mark. Ribs are done when they fall apart easily when lifted with tongs.
11. When ribs are done, turn off heat and remove them to a plate to cool, along with any bones that may have fallen off and any whole herbs
12. While ribs cool, puree the braising liquid with your immersion blender (or do this in a food processor or regular blender in batches) until smooth and thick. Be careful- it's hot! Let sauce return to a simmer and continue reducing while you separate the meat from the bones and fat. Shred or chunk the meat and return to the pot. Cover and turn off heat.
13. Combine lemon zest with parsley and set aside.
13. Boil gnocchi in salted water until it floats, strain in sink and toss with a little olive oil to prevent sticking. Heat 1 Tbsp EACH olive oil and butter in a wide pan and cook gnocchi a few minutes on each side until just crisp on the edges.
14. Portion gnocchi into individual bowls, top with short ribs and sauce, sprinkle with parsley/lemon zest mixture and top with shaved parmesan
ENJOY!
Notes
- Serves 4 to 6 depending on portion size
- If making ahead follow through step 12 and cool to room temperature. Refrigerate up to two days. Skim off any fat that's settled on top and re-heat on stove top.
- I use bone-in short ribs for this and don't suggest substituting boneless. The bone adds a lot of flavor and provides collagen/gelatin that thickens the liquid as well. I feel like the bone also prevents the meat from drying out during the long cook time.
- When browning the meat make sure you have plenty of room around each rib, don't crowd your pan (this means you'll most likely need to brown them in batches). This is an important thing to consider whenever a recipe calls for browning. When your meat is too close together in the pan two things happen- your pan cools down which means browning takes longer AND the meat will steam rather than get the crispy browning you want.
- I always use kosher salt in my recipes, never table salt. Table salt is much finer which makes it saltier and harder to season with evenly. I prefer Diamond Kosher salt so if you ever see me measuring salt in a recipe make sure that's what you're using otherwise your final dish may be too salty
I hope you enjoy these braised short-ribs with ricotta gnocchi as much as we do!
And, as always, I love to hear how my recipes turn out for you (and I especially love to see your food photos)! So tag me at @breathingandcooking on facebook and Instagram with your creations!
And don’t forget to breath, trust yourself and enjoy the process ❤️
Leave a Reply