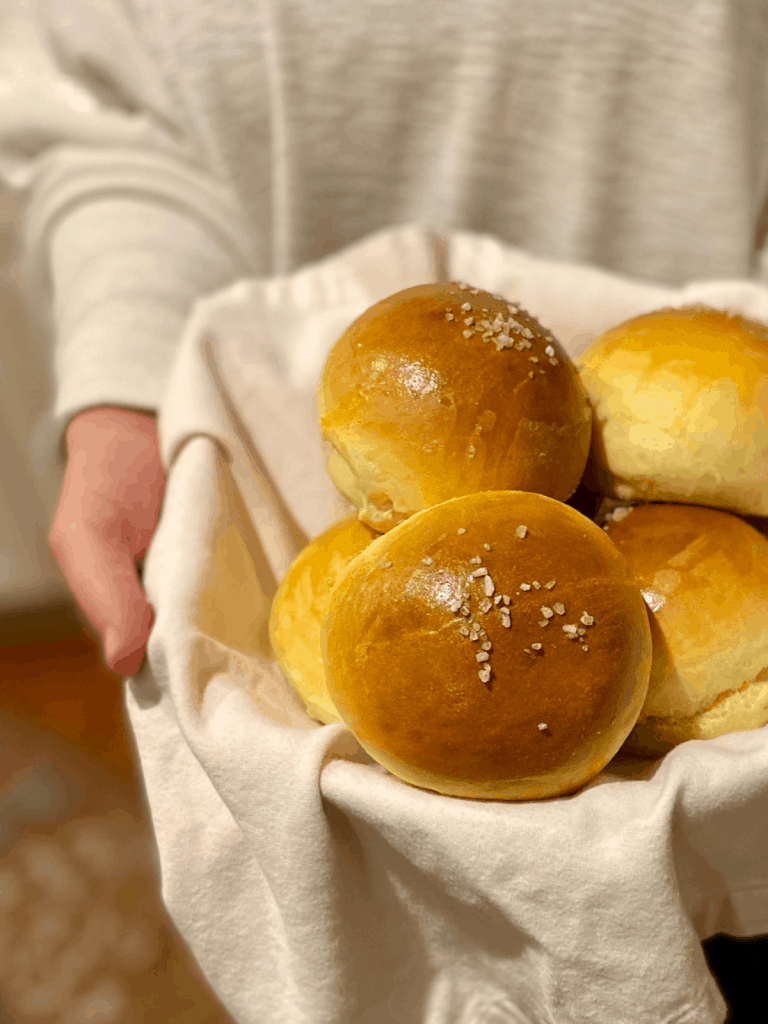
Brioche buns have beautiful golden brown, shiny tops and soft, tender insides. The eggs and butter in the dough give them a wonderful, rich flavor and a texture that will hold up to your juiciest burger.
Why make your own buns?
I started making my own buns regularly about 4 years ago when reading ingredients became a regular habit for me. We do our best to stay away from highly processed oils (vegetable, canola, soy, etc) and it’s really eye opening when you start reading labels and realize just how many food items we regularly buy that contain them. I won’t get into my food philosophy here (maybe someday on this blog) but we’ve found what works for us and “bad oils” aren’t part of it. Give me butter, olive and avocado oil all day long.
But the other reason? Satisfaction, the process and baking therapy…
I happen to love making yeast breads. Something about how the same simple ingredients put together in different ways can create totally different results. The way yeast and sugar and eggs and butter smell when they’re combined. The feel of dough under your hands as you knead and shape it. The timing, the process…ahhhhhh….it’s magic, really.
These buns need to be started early in the day because they take 4 hours to make from start to finish. Much of that time is the dough rising while you go along with your day. Hands off time. But the result is so worth the wait and the effort:)
There’s a learning curve while you get to know what feels right when it comes to dough and it’s a hard thing to explain in words. Bread is one of those things you get better at over time and with experience. That’s probably part of what makes it so magical and personal. You rely on your sense of touch and smell and vision more than the technical measurement of ingredients. I feel like cakes and cookies are more exact, but bread is alive and some days are different than others.
If you’re new to making yeast bread be kind to yourself and be patient. I’ve had my share of failures but they were all learning experiences and- when you get it right??? SUCH a good feeling!!!
What is the purpose of a sponge?
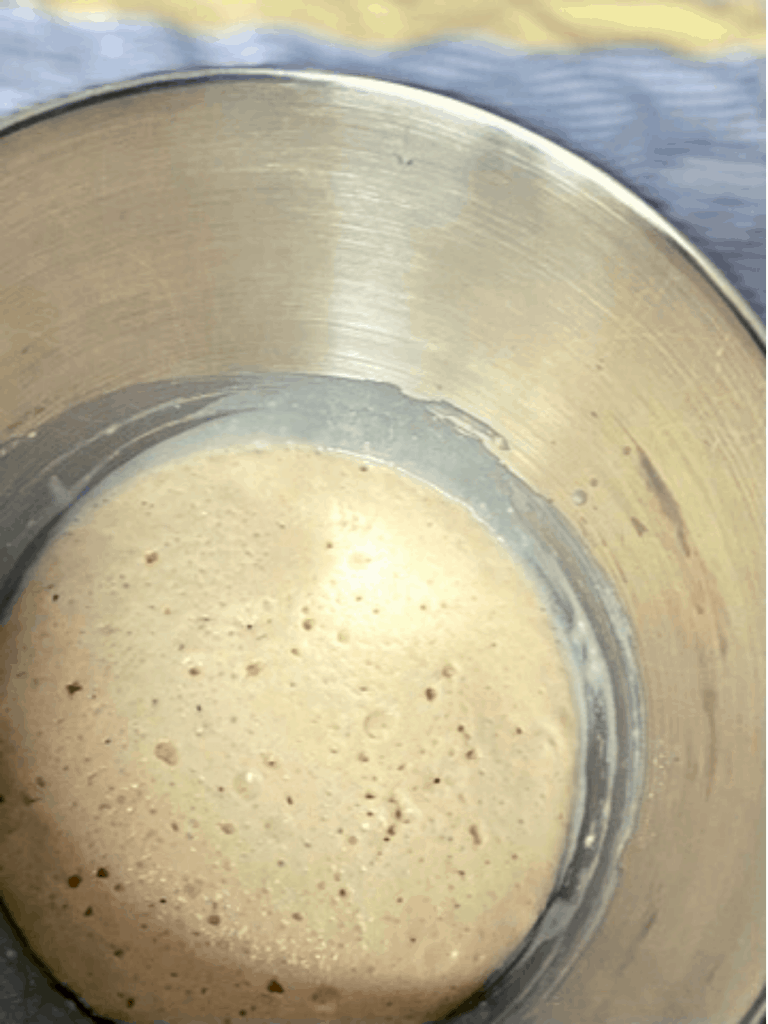
This brioche uses a sponge. A sponge is a combination of warm milk, yeast, sugar and some of the flour you’ll be using in the recipe. First, you proof your yeast by combining it with warm milk (not hot, 100-110 degrees is ideal) and letting it sit for 5-10 minutes. It should get bubbly and this lets you know it’s alive and ready to do it’s job. After the yeast has proven itself worthy you’ll add the sugar and some of the flour, mix to combine, cover, and leave it to ferment for a little while before you add the rest of the dough ingredients. Starting with a sponge is important for developing the final fluffy texture and rich taste that makes brioche so wonderful.
Making the dough
Once your sponge is all nice and bubbly add the remaining flour, eggs and salt. Mix on low with a dough hook for 4-5 minutes. Because this dough is sticky I really prefer to use a stand mixer. Scrape the dough down a couple of times while mixing to make sure everything is incorporated well.
After 4-5 minutes you can start adding the butter. Make sure it’s softened and cut it into 8 pieces. With your mixer running add one piece at a time, letting it incorporate into the dough before adding the next piece. You’ll need to scrape the bowl during this process. Once it’s all incorporated into the dough you’ll continue kneading with the dough hook on low speed until the dough is nice and smooth and shiny.
You may need to add 2-3 Tbsp of additional flour if the dough looks too sticky. Keep in mind this IS a sticky dough by nature but you don’t want it completely unmanageable. It will firm up over the next couple of hours, but for now you need to scrape it into an oiled bowl and shape it into a ball, cover with a towel and let it rise in a warm, draft free place.
My oven has a “proof” setting, but if that’s not an option I’ve found that just setting it inside the (not turned on) oven with the oven light on provides the perfect environment.
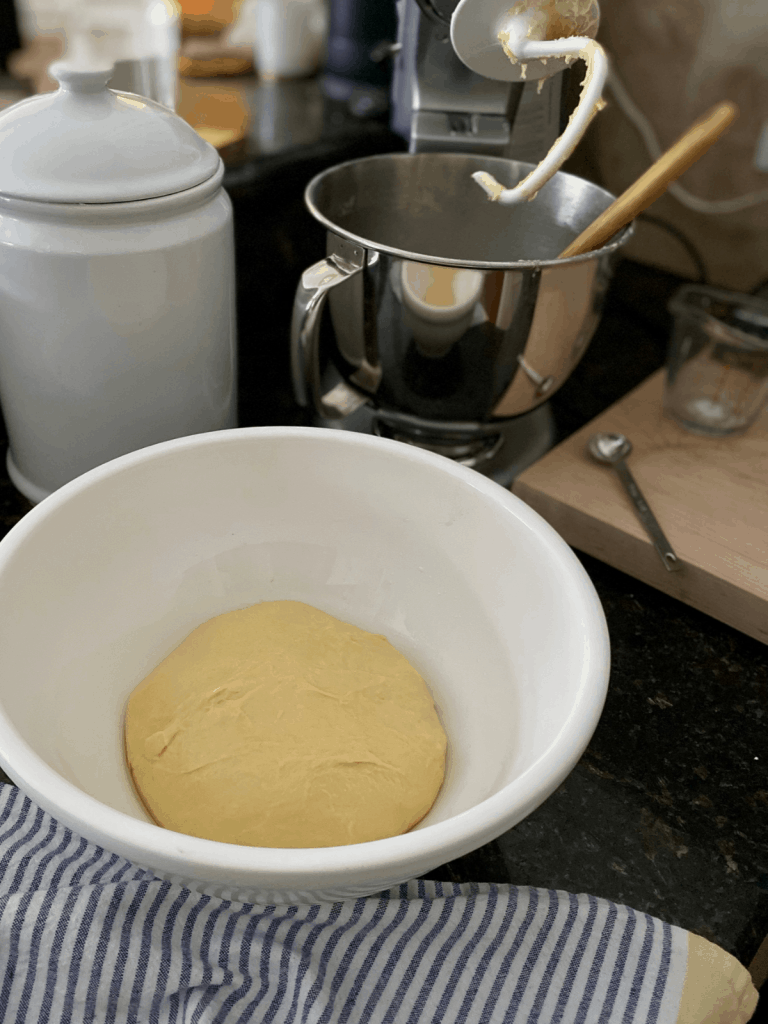
1. place dough in oiled bowl 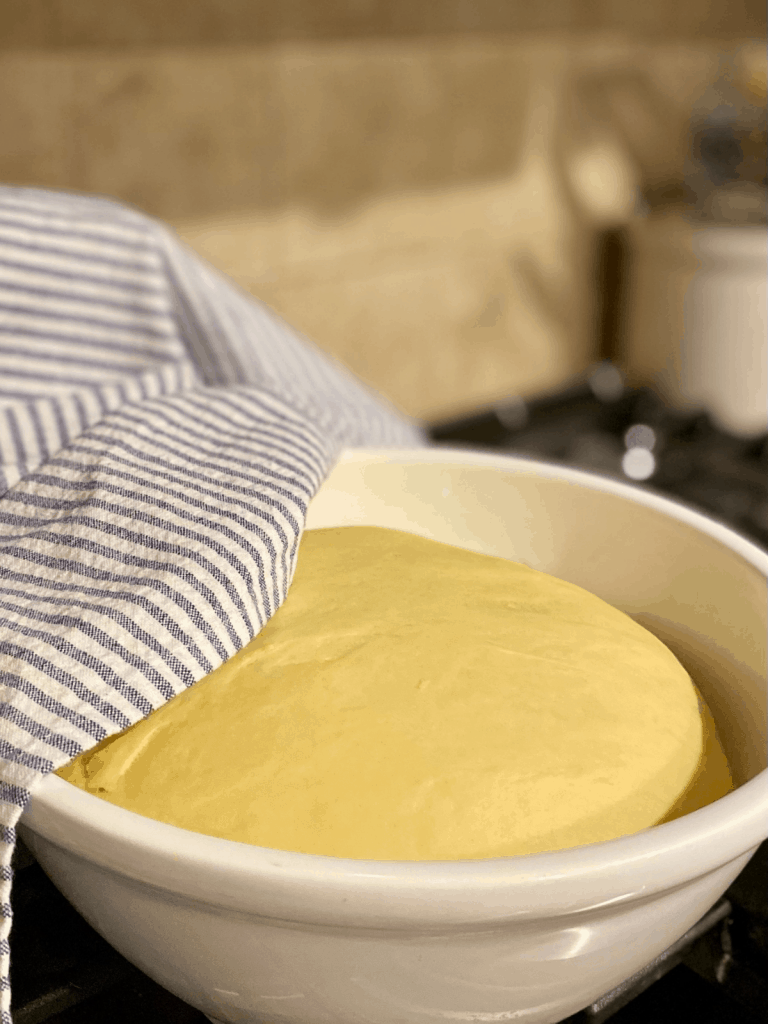
2. Let rise, covered, in a warm place until doubled 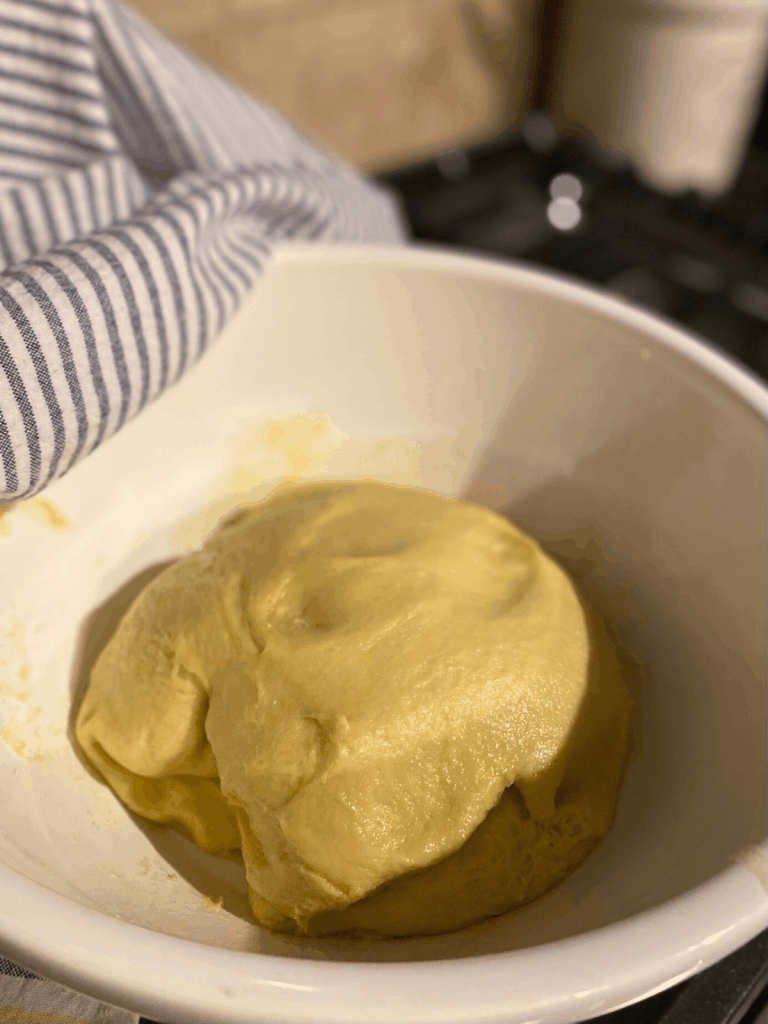
3. Punch dough down, cover and let rise again Before shaping
The final dough has two rises. It should double in size after the first rise. Punch the dough down, fold it over itself, cover and let rise again. Now you’re ready to shape the buns.
Shaping brioche buns
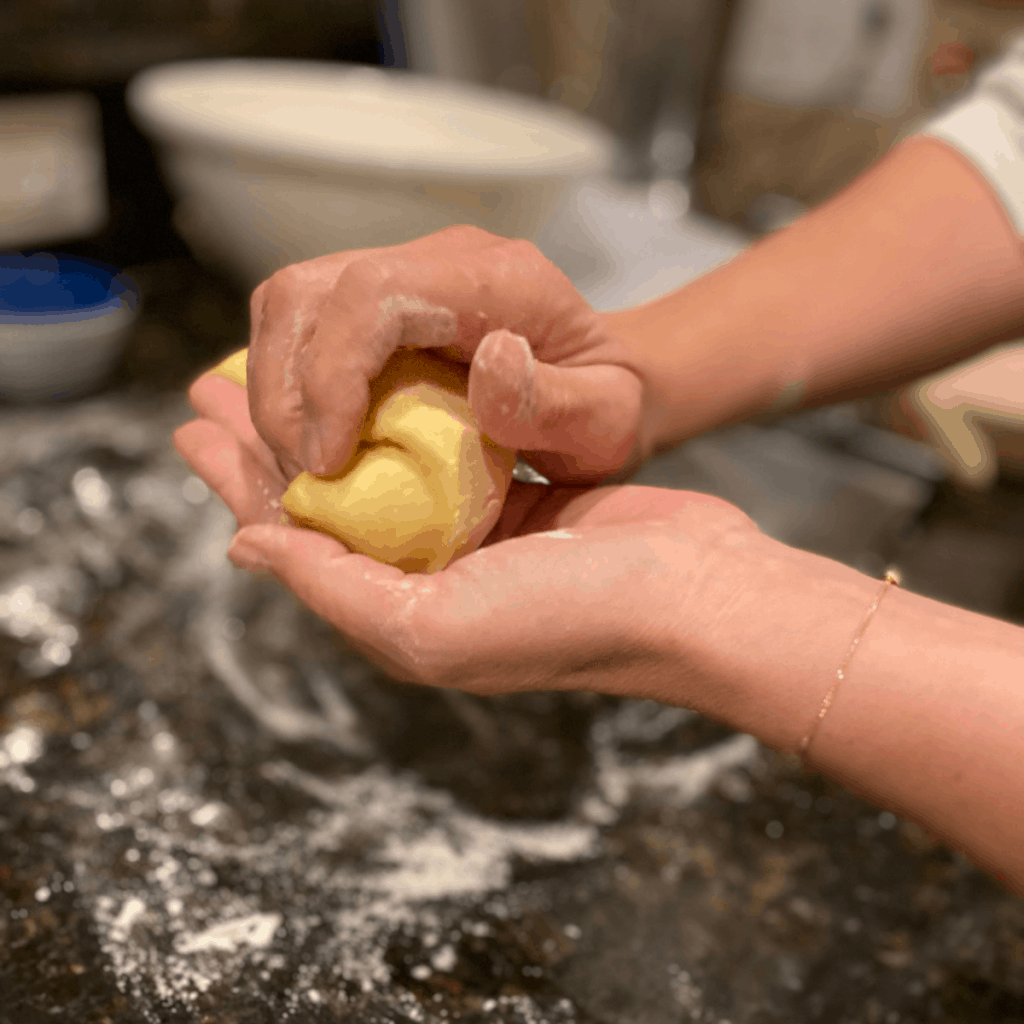
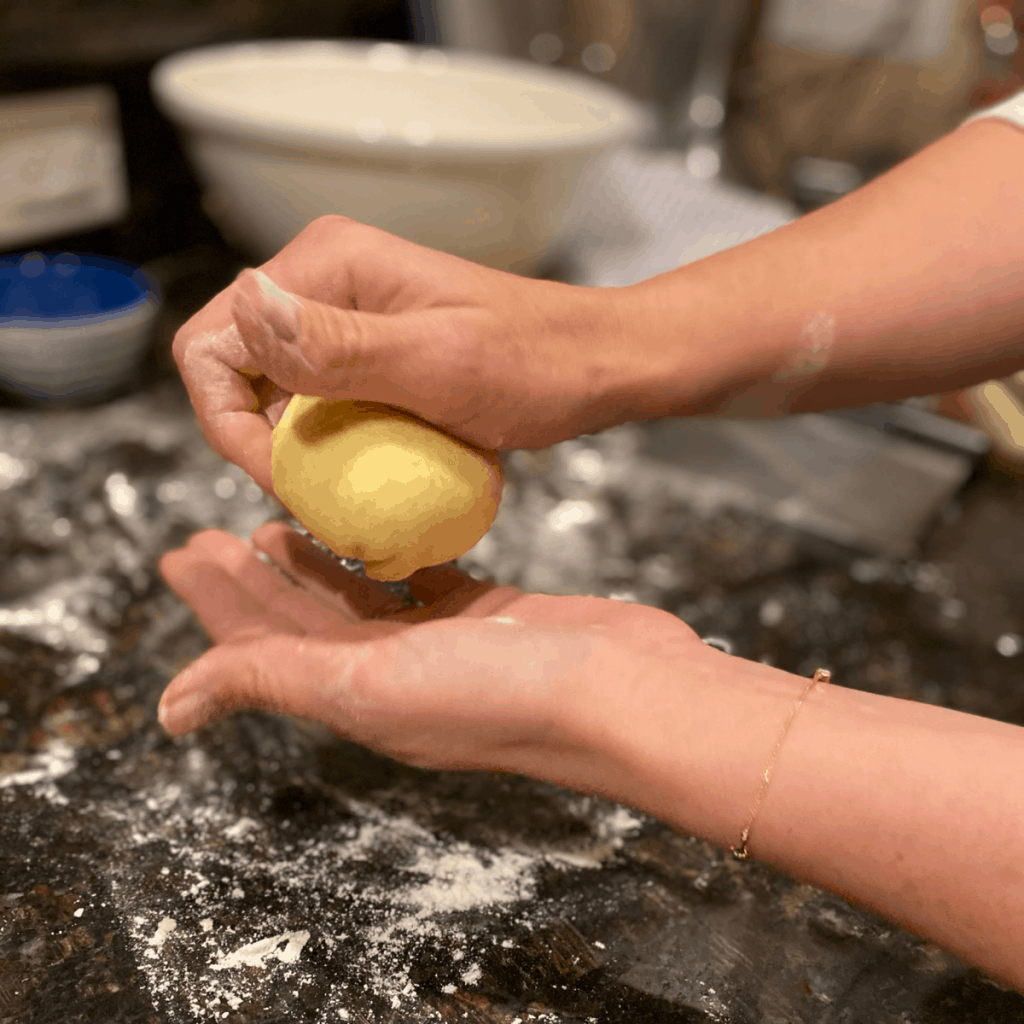
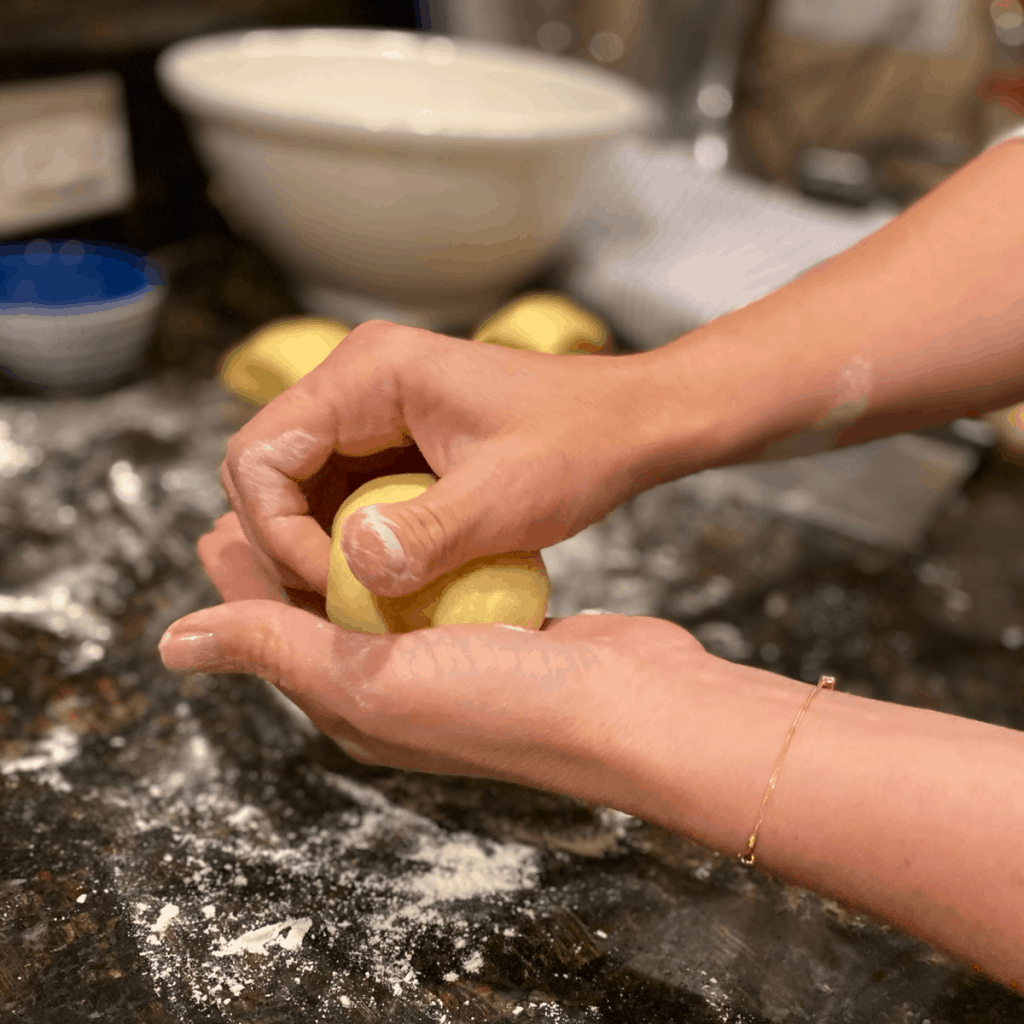
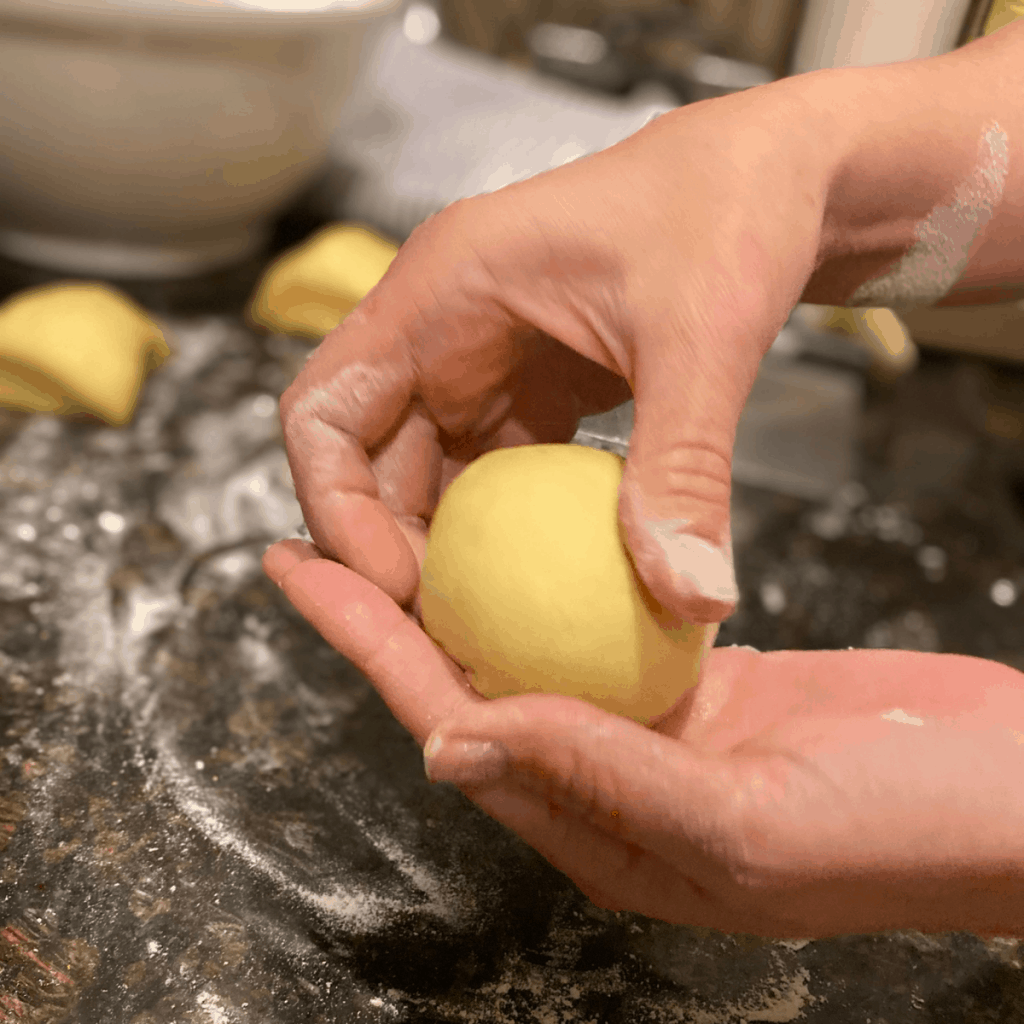
Cut the the dough into 10-12 portions depending on the size you want. The pictures in this post are for 10. With lightly floured hands rest the dough ball in one hand and use the other to push/pull the dough edges under slightly, turning the ball as you go so that all sides are eventually smooth.
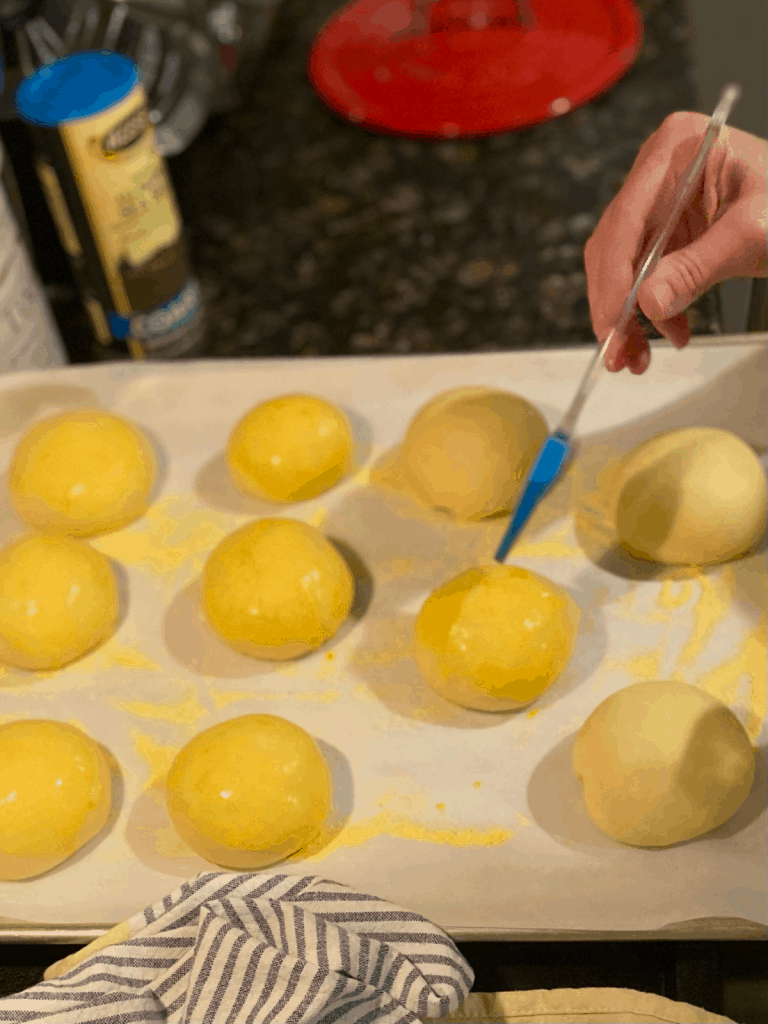
Prepare a baking sheet (or baking sheets) by lining with parchment and sprinkling with cornmeal. Arrange buns on the sheet/s so that there’s enough room between them to double when they bake without touching each other. Cover with the towel and let rest 20 minutes.
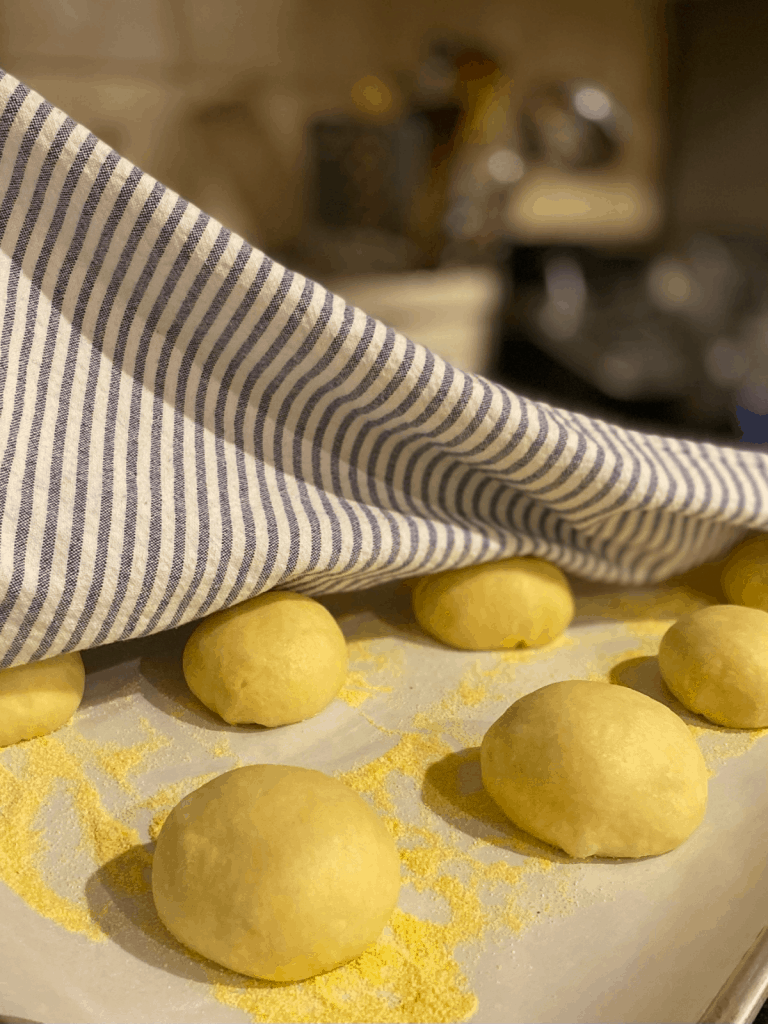
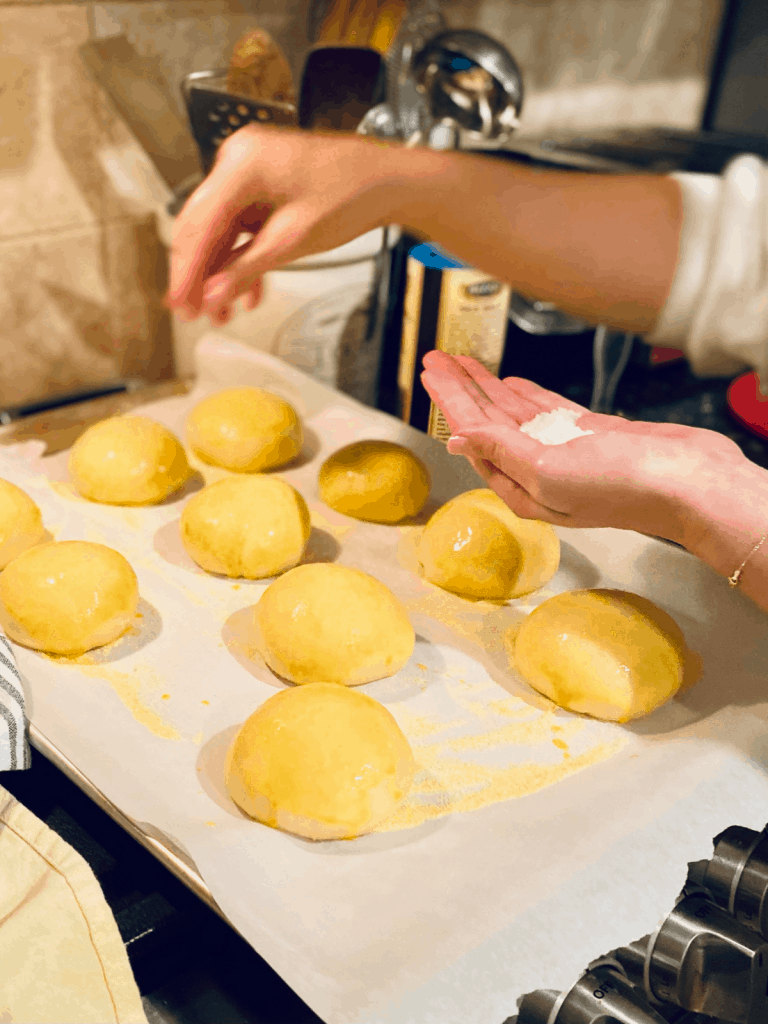
While buns are resting preheat the oven. Make an egg wash by whisking one egg with 1 Tbsp of water in a small bowl. Have some sea salt ready for sprinkling on the tops. After 20 minutes gently brush each bun with the egg wash and sprinkle with salt.
Bake the buns at 400 for 7 minutes, turn the heat down to 350 and continue baking for another 10-12. You want the buns to have a beautiful golden color. Let the buns cool slightly on the baking sheet before removing to a wire rack.
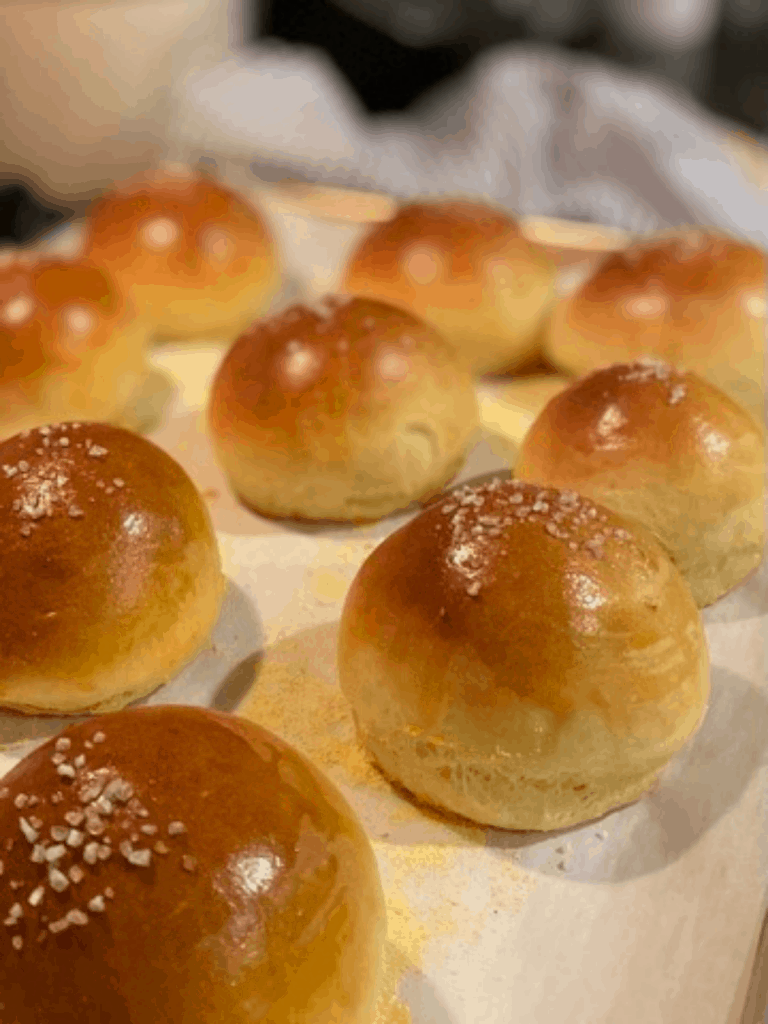
That’s it! You’ve made gorgeous, rich, buttery brioche buns (and your house smells amazing)!
Try them with these crazy good pulled pork sandwiches or these fillet cheesesteaks with melty peppers!
I hope you try making these buns, you’ll be forever spoiled from grocery store buns after you taste them. Enjoy!
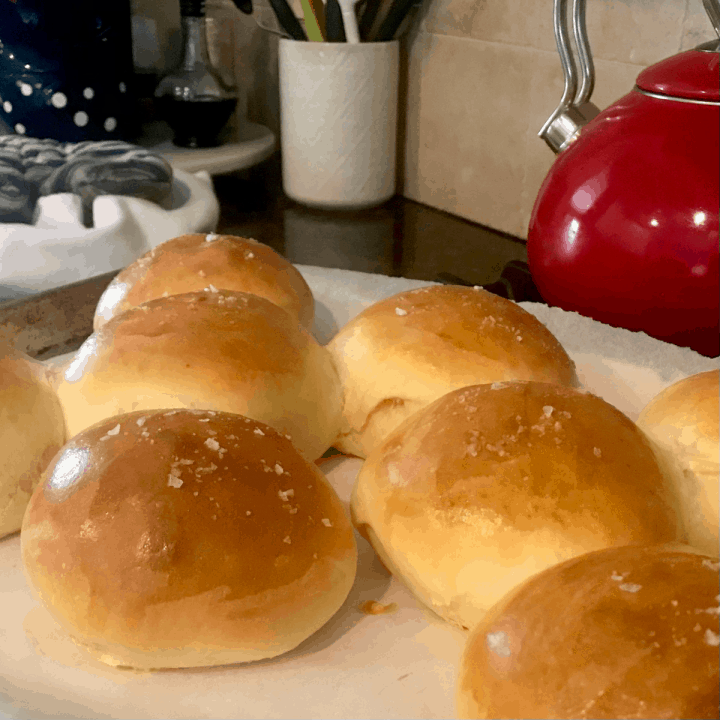
Rich and Buttery Brioche Buns
Buttery, rich, tender brioche buns are perfect for burgers or sandwiches. Plan ahead as they take 4 hours - much of which is hands off rise-time- but the result is worth the effort!
Ingredients
- 2/3 cup warm milk (not hot)
- 2 1/2 tsp active dry yeast
- 3/4 cup (3.5 oz) all purpose flour
- 3 TBSP sugar
- 3 cups plus 2 TBSP (14 oz) all purpose flour
- 1 1/2 tsp kosher salt
- 4 eggs, room temperature, lightly beaten with a fork
- 1 stick (4 oz) unsalted butter, softened
- cornmeal for dusting
- 1 egg whisked with 1 TBSP water
- Course sea salt for sprinkling
Instructions
- Place yeast in large bowl of stand mixer. Pour warm (not hot, 100-110 degrees f is ideal) milk over yeast and let it stand 5-10 minutes. It should be bubbly. This is called proofing your yeast and it's really just a test to make sure your yeast is alive and will do what you need it to do in your recipe. If it's not bubbly start over with new yeast.
- Add 3/4 cup flour and 3 TBSP sugar, stir to combine, cover and let stand 30 minutes. It will be nice and foamy/bubbly when it's ready. This is your sponge. Creating a sponge before adding the rest of your ingredients is key in developing the flavor and texture that make this bread so good.
- Add remaining flour, salt and lightly beaten eggs to sponge in bowl and knead with the dough hook for 4-5 minutes. It will be sticky and take a little while for all of the flour to incorporate, so scrape down the sides a couple of times with a rubber spatula while it's mixing.
- With mixer running add your butter 2 TBSP at a time, letting butter fully incorporate into dough in between each piece. You'll need to scrape bowl several times during this process.
- Once butter is incorporated continue kneading on low speed for 5 minutes until dough is smooth and shiny. You may need to add a little more flour (up to 3 Tbsp- one at a time) during this process if the dough is too sticky. keep in mind this IS a sticky dough but you don't want it completely unmanageable. If you've made bread before you will think it's too soft but it does firm up as it rises and has time to develop.
- Scrape dough into an oiled bowl large enough to hold it once doubled. I turn the dough over in the bowl to make sure all sides are lightly coated in oil. It will feel sticky and soft but ultimately be able to be shaped into a ball.
- Place bowl in a warm, draft free place, covered with a towel, for 1 1/2 hours or until doubled in size. I have a "proof" setting on my oven but before that was available I'd put it inside my oven (no heat!!!) with the light on and that provided a nice draft free atmosphere. I also put a sticky note on the oven door so no one would turn it on unaware of the dough inside.
- After dough has doubled, punch it down and fold it over itself, cover and let rest another 45 minutes.
- Have 2 baking sheets ready, covered with parchment and sprinkled generously with cornmeal ( in lieu of cornmeal you could use more flour. I like the texture the cornmeal gives the bottom of the buns)
- After 45 minutes, turn dough out onto floured surface. Get a little flour on your hands and portion dough into 8 pieces for sausage rolls or 10-12 pieces for burger buns. Working with one piece at a time shape each into balls or ovals (ovals will be about 5 inches long). Don't be afraid to use flour as you need it to keep dough from sticking (just don't knead anymore INTO the dough)
- If making burger buns: Place dough balls evenly spaced between the two sheets and press each gently just to slightly flatten
- If making sausage rolls: Arrange side by side with only about 2 inches between pieces. They'll touch slightly as they bake and this will help them keep their shape and get tall.
- Cover dough, return to warm, draft free place and let rise 20 minutes. Preheat oven to 400f and make sure your oven racks are positioned to have enough space between them for both sheets.
- While oven is heating and buns are rising whisk an egg with a TBSP of water in a small bowl. You don't want the egg to be cold when you brush it over the buns so do this now.
- After 20 minutes gently brush buns with egg wash being careful not to deflate them and sprinkle with sea salt (you want big, crunchy salt crystals for this). If you don't have sea salt you CAN use kosher or Maldon, just be careful not to use too much. Sea salt is the best for this though.
- Bake at 400f for 7 minutes and then reduce temperature to 350f for another 10-12 minutes. They will bake for a total of 17-19 minutes and it's important to adjust the temperature after 7 minutes.
- Let buns cool slightly before moving to a cooling rack
- Enjoy!
Notes
These really are best the day they're made but you can keep for one day, in a bread bag, at room temperature. Don't refrigerate because they'll dry out.
For longer storage you can wrap individually in plastic wrap and store in freezer bags in the freezer.
Leftover buns also make great croutons or garlic bread!

Leave a Reply