Flakey-buttery- golden pastry, earthy-umami-rich duxelles, salty-sweet caramelized onions and tender-perfectly-pink fillet served with a luscious bourbon cream sauce. Beef Wellington is one of those iconic entrees that special occasions beg for!
Or maybe just a random Friday night 🙂
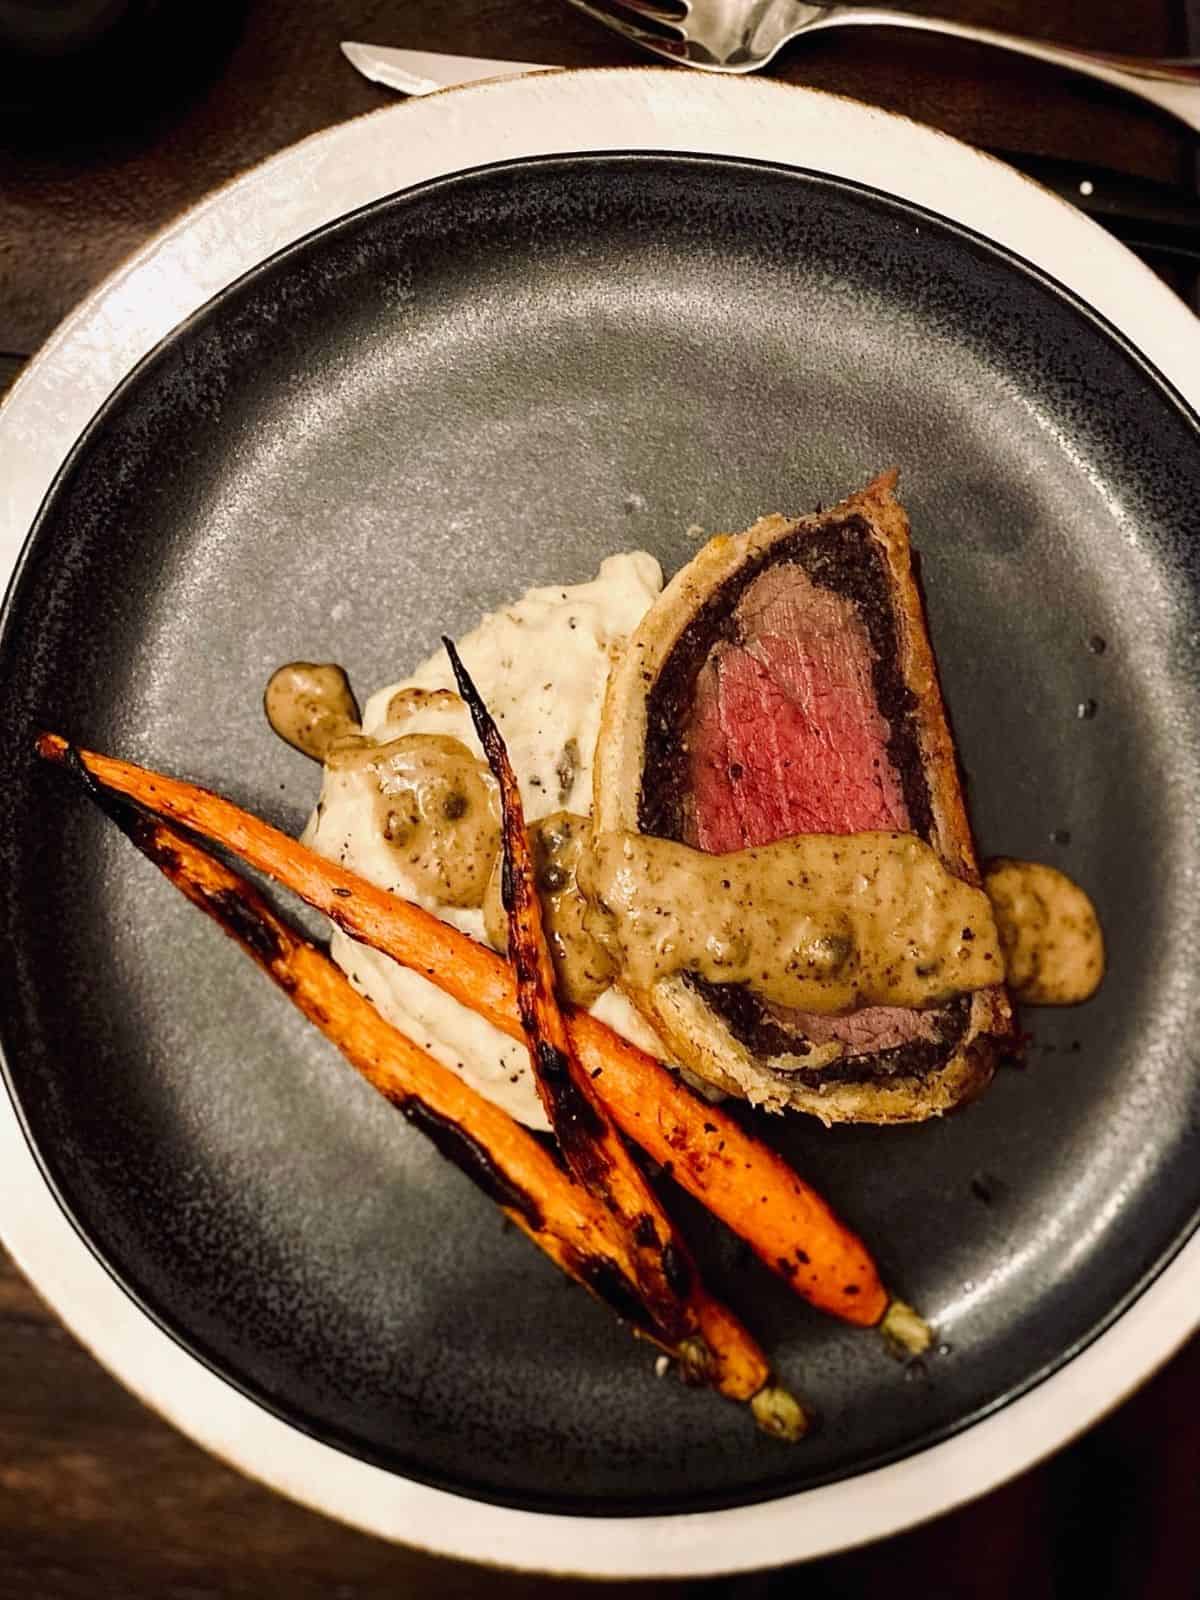
You’ll be soooo happy you made this
This Wellington is a combination of several recipes I’ve found over the years, my own tweaks and preferences, and a method I recently learned from Cook’s Illustrated. It’s scaled to serve four, which is perfect for smaller, more intimate get togethers.
Beef Wellington is one of those dishes that, for years, I would read about in magazines and see people order in the movies…fancy, beautiful and eye-rollingly delicious. And for a long time it seemed completely out of reach (read- expensive and complicated). So I put it on my cooking bucket list (which also included a proper cassoulet) and there it sat until three years ago.
I was itching to have a dinner party AND I needed some kitchen therapy. So we invited eight friends over and I decided to attempt Beef Wellington. Because it totally makes sense to try something like that for the first time when you’ll be serving it to a group of 10, right? That night I made individual Wellingtons and since then I’ve made Wellingtons that serve 10 as well as this version that serves 4. I’ve even made turkey, salmon and vegetarian wellingtons. I have yet to meet a wellington I don’t like 😉
Skip straight to the recipe if you’re Gordon Ramsay-esque with your Wellington skills, I won’t be offended!
But if this is new for you, it’s worth reading. Understanding WHY & HOW will help you immensely. I wish I’d had all of this info the first time I made a Beef Wellington! Make sure you check out the How-To card under the recipe for step-by-step pictures that will walk you through the assembly!
Planning Ahead Means You’ll Be Able To Relax & Enjoy Your Evening
Here’s the thing. This dish seems complicated at first. BUT, once you break it down into manageable steps, over several days it becomes much more doable. AND it makes the actual day of your dinner super easy. Trust me, you’ll be so happy you did this!
I’m providing a timeline for starting 4 days out. Of course, you can bang the whole thing out in one day if you want, just leave yourself enough time for the initial salting of the beef (12 hours) and the chilling.
On the day you plan to serve it, all you’ll need to do is place it in the oven, pour yourself a congratulatory glass of wine and enjoy your company.
Here’s how to break it down over several days
Three days before:
- Salt and wrap your tenderloin
- Prepare pastry, duxelles and caramelized onions
A few tips for the dough
The pastry is important in this version. For the cooking method used here you cannot use puff pastry. I use a food processor and haven’t tried making it by hand, but if that’s something you’re comfortable with and you don’t have a food processor, you can go that route.
- Cube and chill the butter before mixing the dough
- You want the dough a little crumbly before shaping, don’t overmix it
- Shape quickly with your hands so that your body heat doesn’t warm the butter
- You want to be able to see little flecks of butter in the dough.
- Chill for at least 8 hours

What are duxelles?
Duxelles is a finely chopped mixture of mushrooms, garlic, shallots, herbs and pepper that’s sautéed in butter until it becomes a paste. Traditionally cream or madeira is added at the end, in this version we’ll use whisky (but you can always use cream or madeira instead if you prefer).
Because mushrooms are 90% water, cooking them this way concentrates their flavor and evaporates much of their natural liquid so that the Wellington doesn’t end up with a soggy crust.
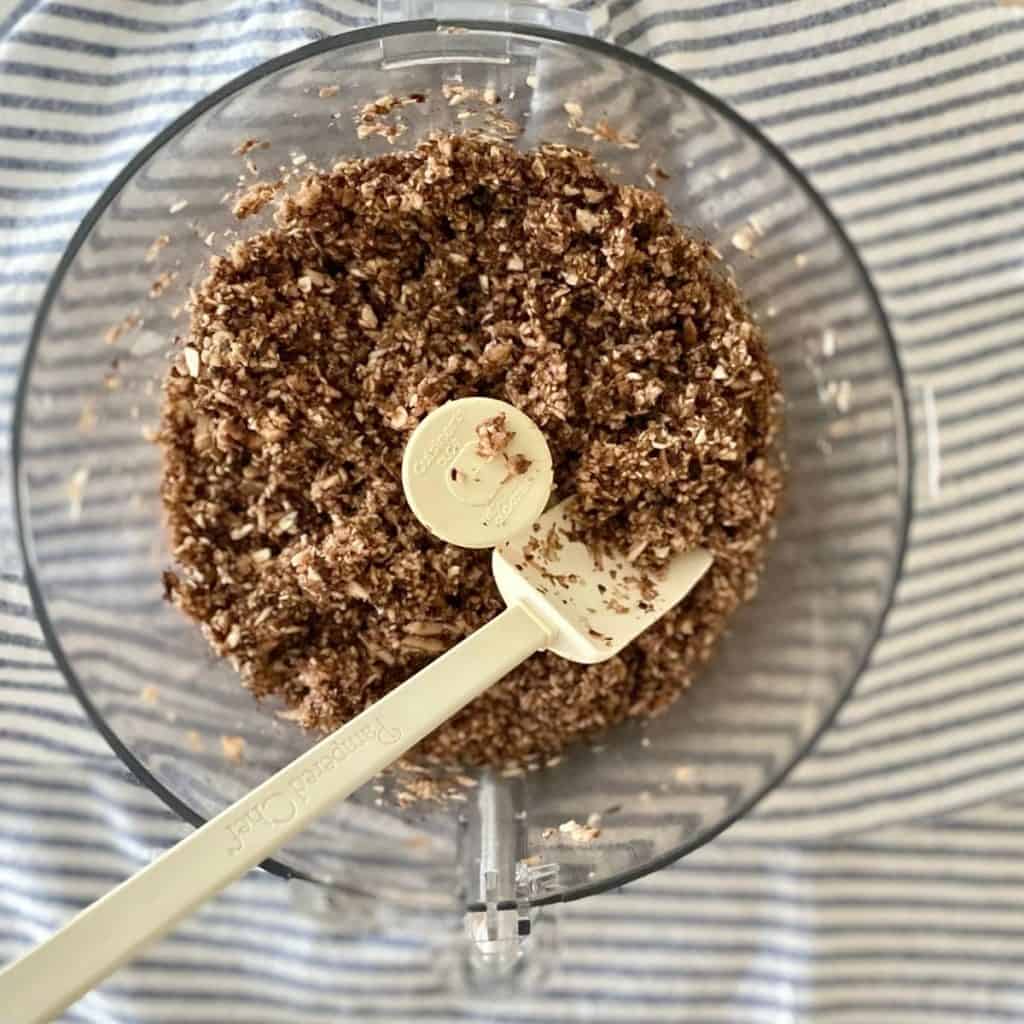
process shallots and mushrooms 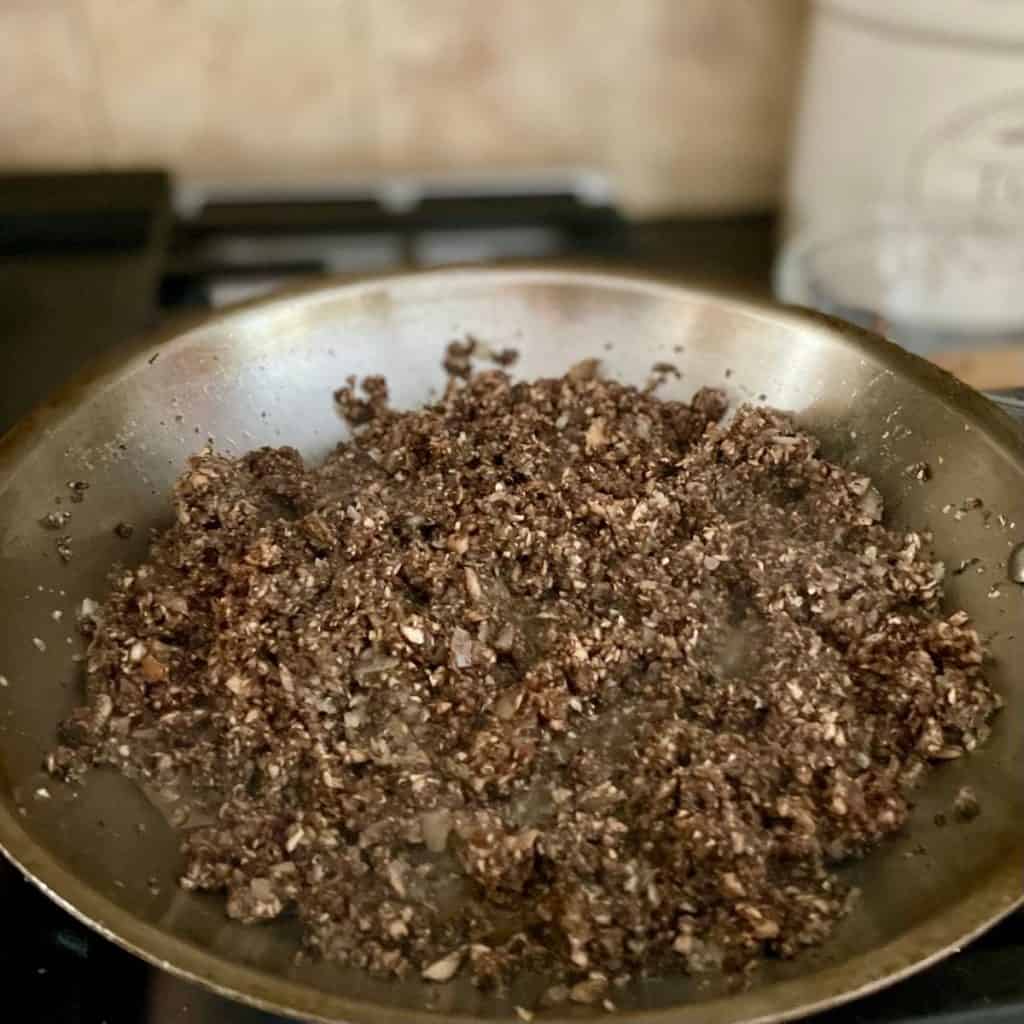
cook the liquid out so your pastry stays crisp
Why caramelize the onions??
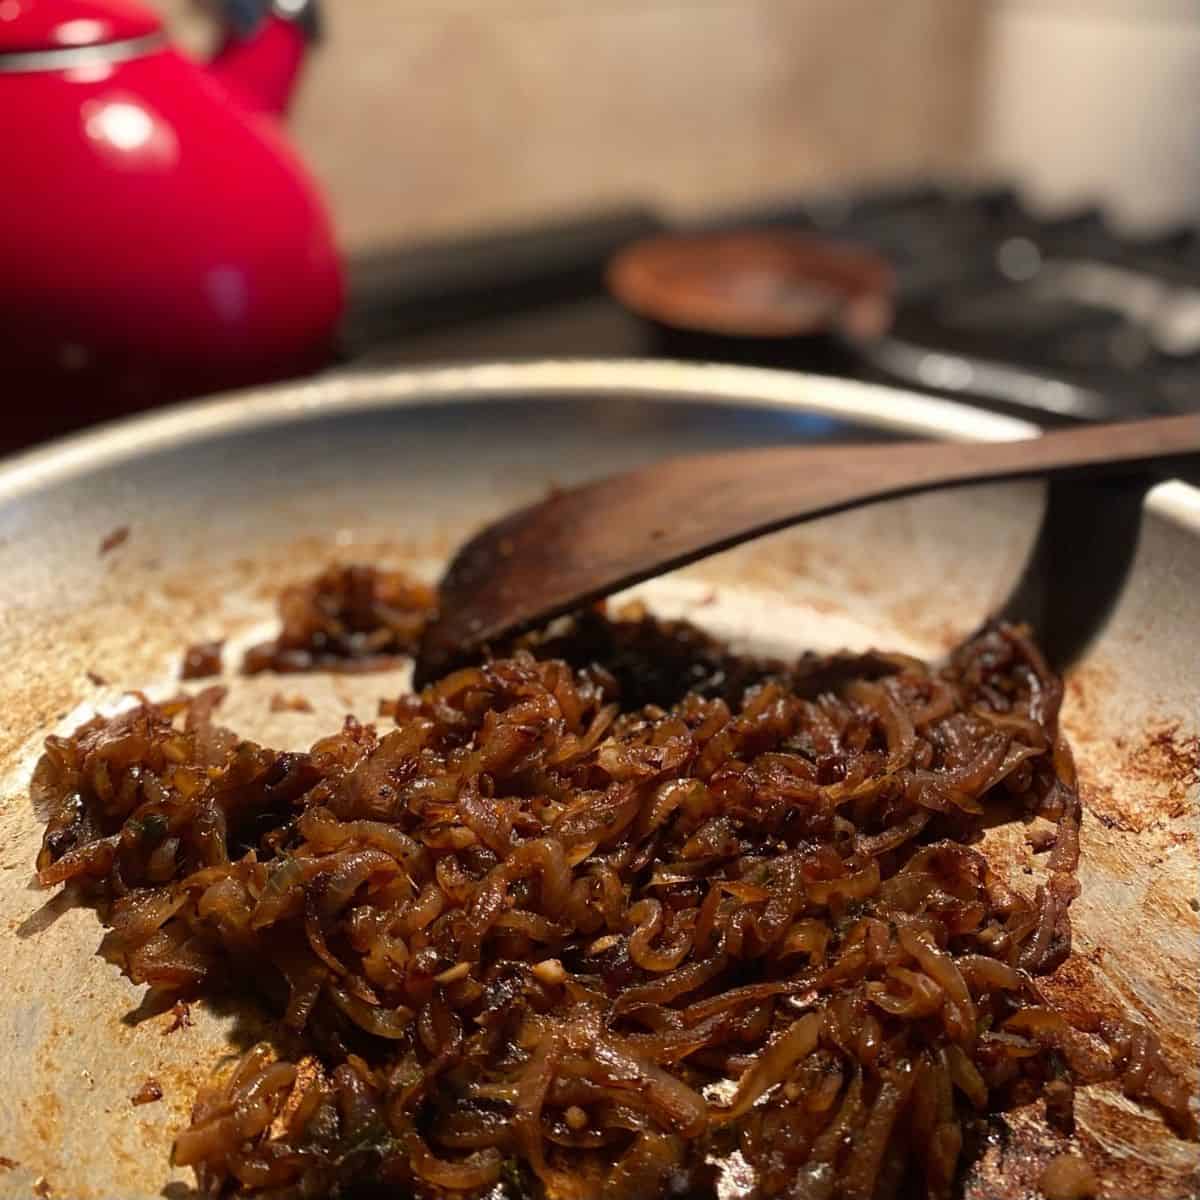
Caramelizing onions reduces their sharpness and produces a really wonderful, mellow, nutty, sweet flavor. Using a mixture of oil and butter helps to keep them from burning during the process. Cut the onions about 1/8 inch thick, but no thinner. Take the time needed to get them to a rich, dark brown color- a good 45 minutes- don’t rush it!
Two Days Before
- Prepare beef
- Assemble fillings and seal with prosciutto
A few tips for easy rolling
- It’s important to dry the beef very well, use paper towels for this.
- Have all of your ingredients chilled and ready
- Shingling the Prosciutto on top of a piece of plastic wrap makes rolling everything up easier
- You have an extra piece of prosciutto for a reason (you’ll find out why soon)
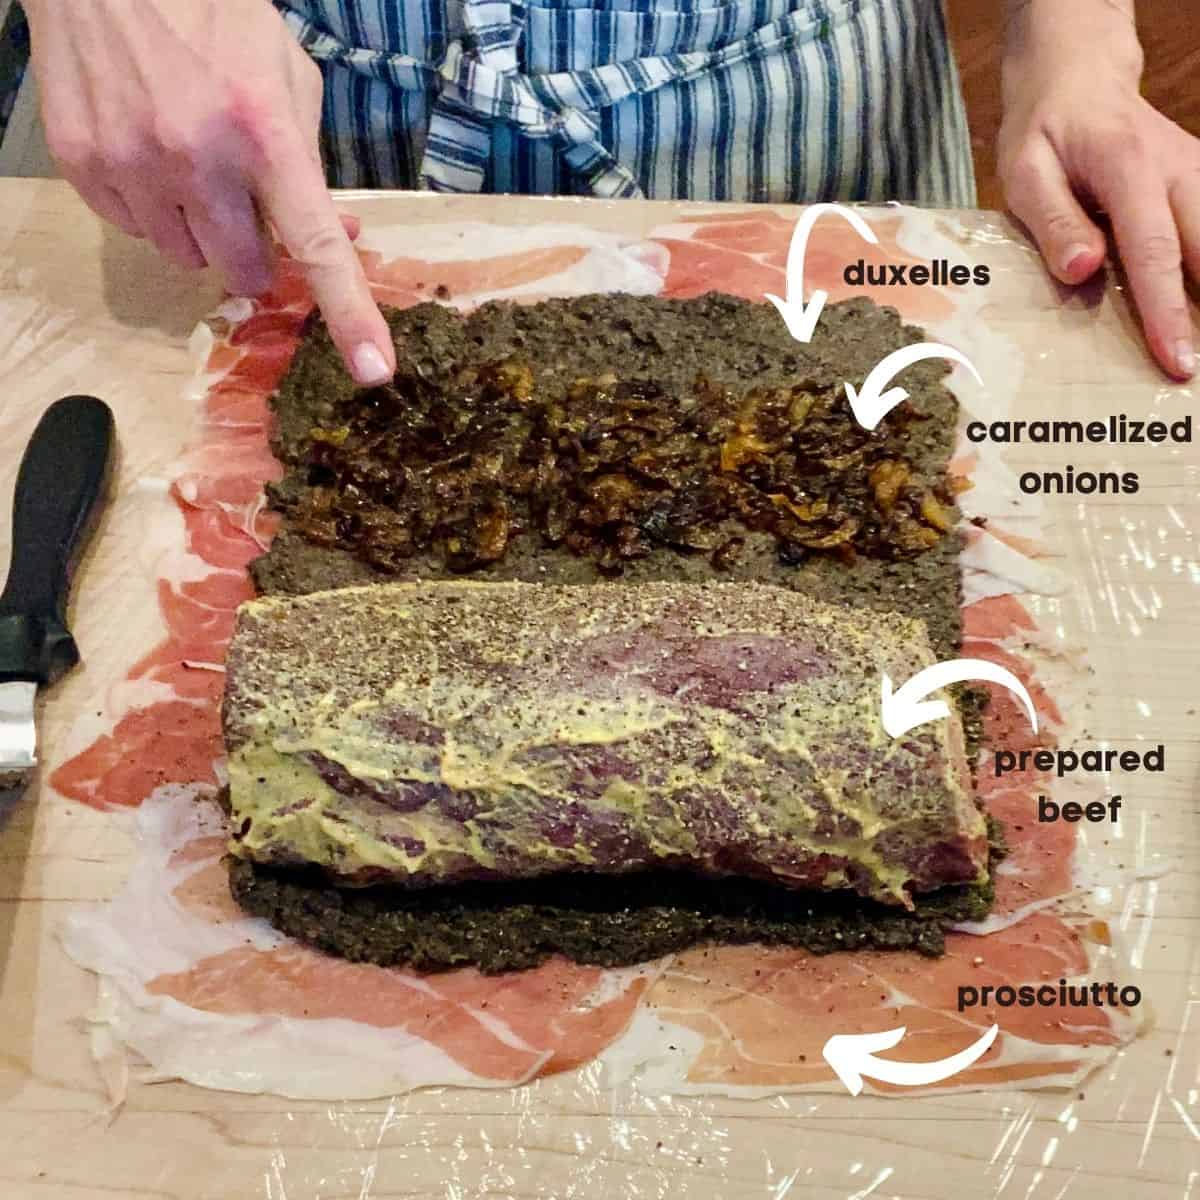
keeping that flavor inside
The prosciutto creates a seal between the fillings and the pastry, which prevents your pastry from getting soggy. After you roll it all up, check for any gaps or tears in the prosciutto and use your extra slice to tear off little pieces to create “patches”. Just press them over any gaps and they’ll stick on their own.
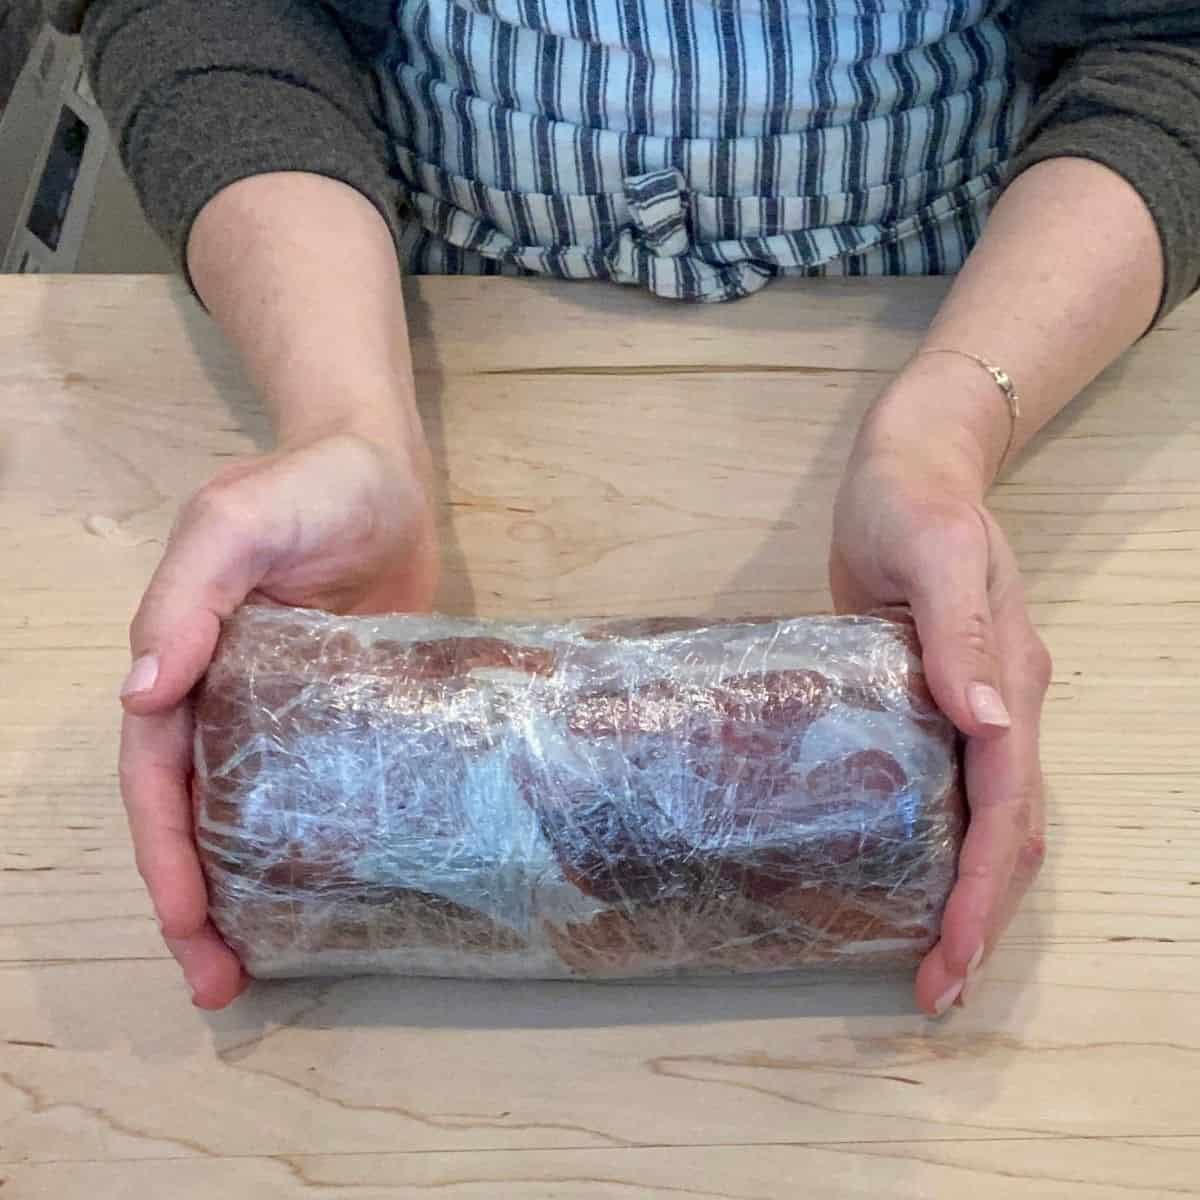
Now, just wrap tightly in plastic wrap and chill (detailed step-by-step photos of this process are on the how- to card at the bottom of this post)!
The Day Before
- Roll out your large sheet of pastry dough
- Wrap and seal the completed Wellington
- Use the smaller sheet to decorate
- Chill until ready to bake
A few tips for the pastry
- Flour the counter before rolling
- Keep the short pastry side toward you
- You want to roll the large sheet to approximately 12×14 (it does not have to be perfect, you’ll be trimming the edges anyway)
- use a bench scraper or thin spatula to make sure dough isn’t sticking before you place the beef on top
- If your dough has gotten too soft, carefully place it on a parchment lined baking sheet and chill for 10 minutes
- Brush the entire surface lightly with egg wash at the beginning. This is like glue that helps seal the whole thing up.
- Keep the dough snug while rolling, but not so tight that it tears
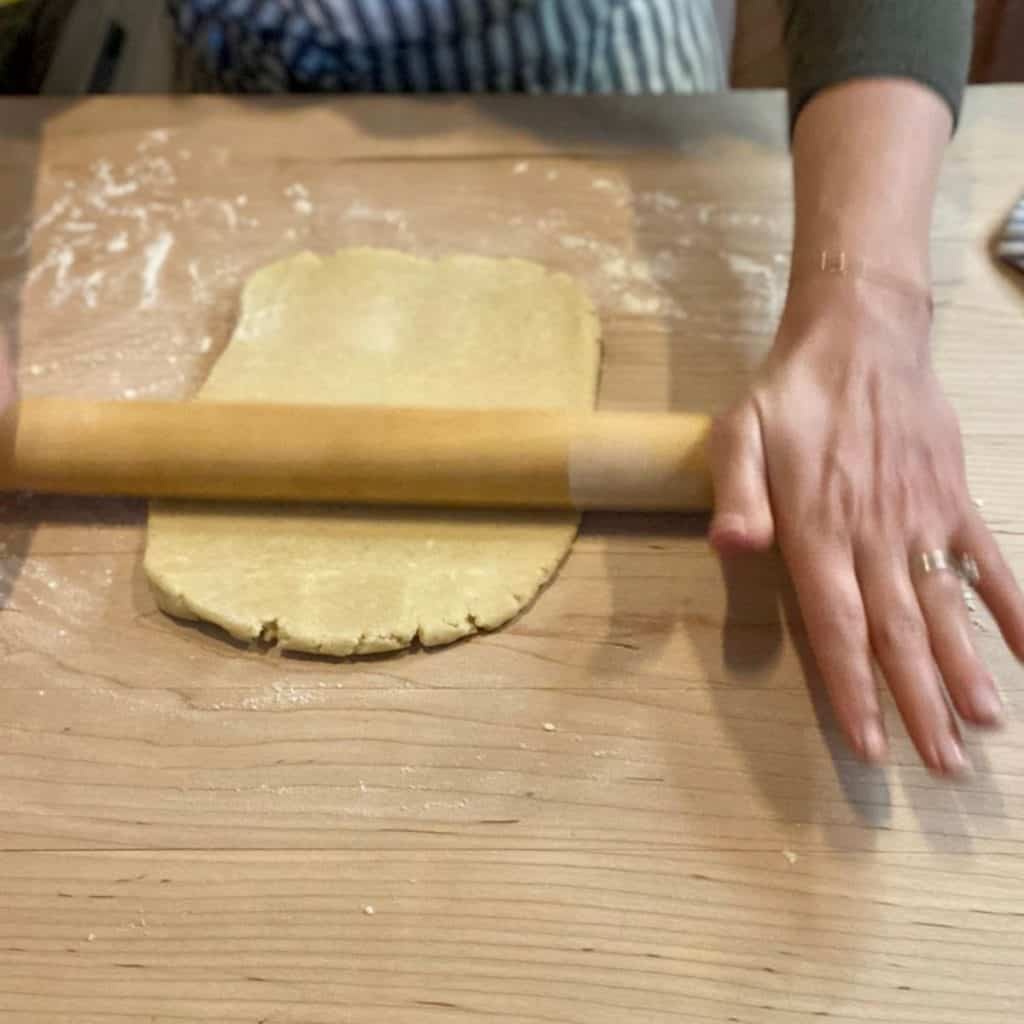
Roll to 12 x 14 rectangle 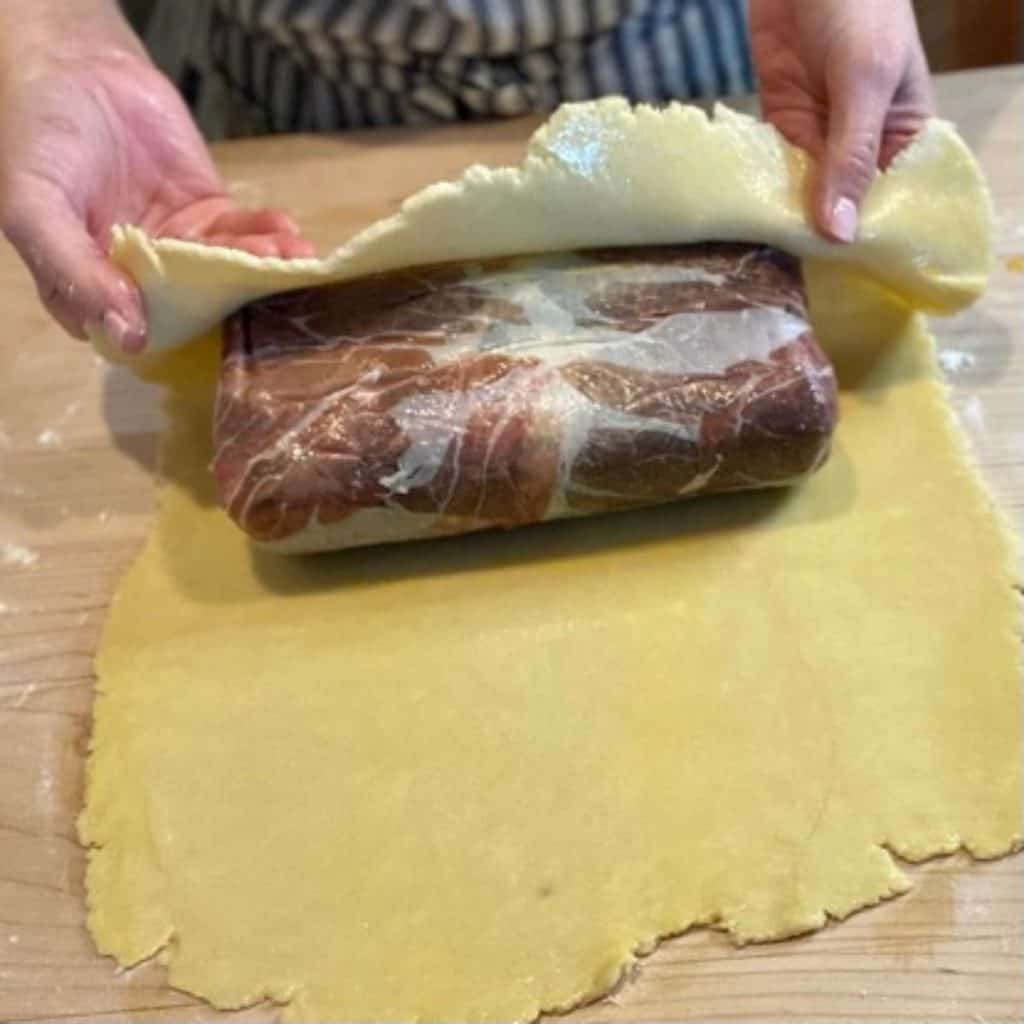
Pull dough over beef 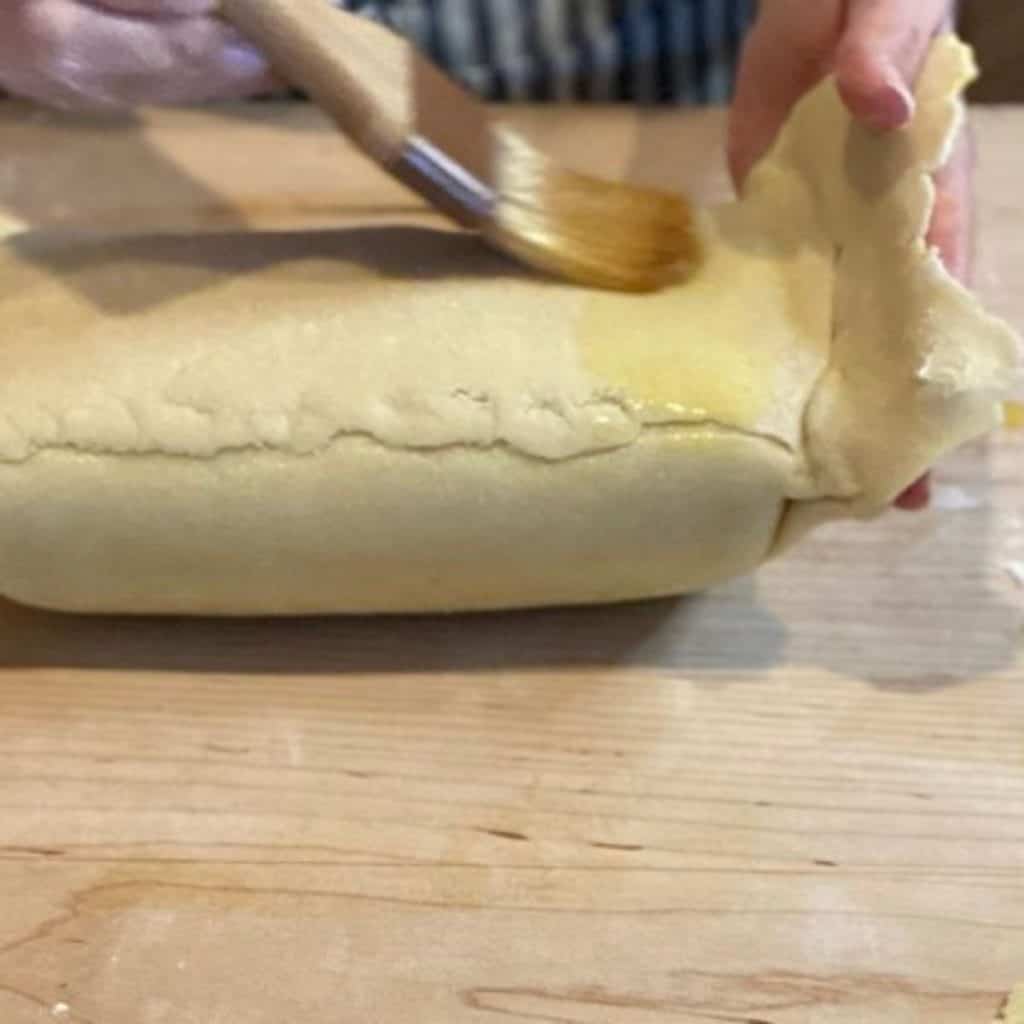
seal with egg wash
Congratulations, you’ve just rolled up a beautiful beef Wellington!
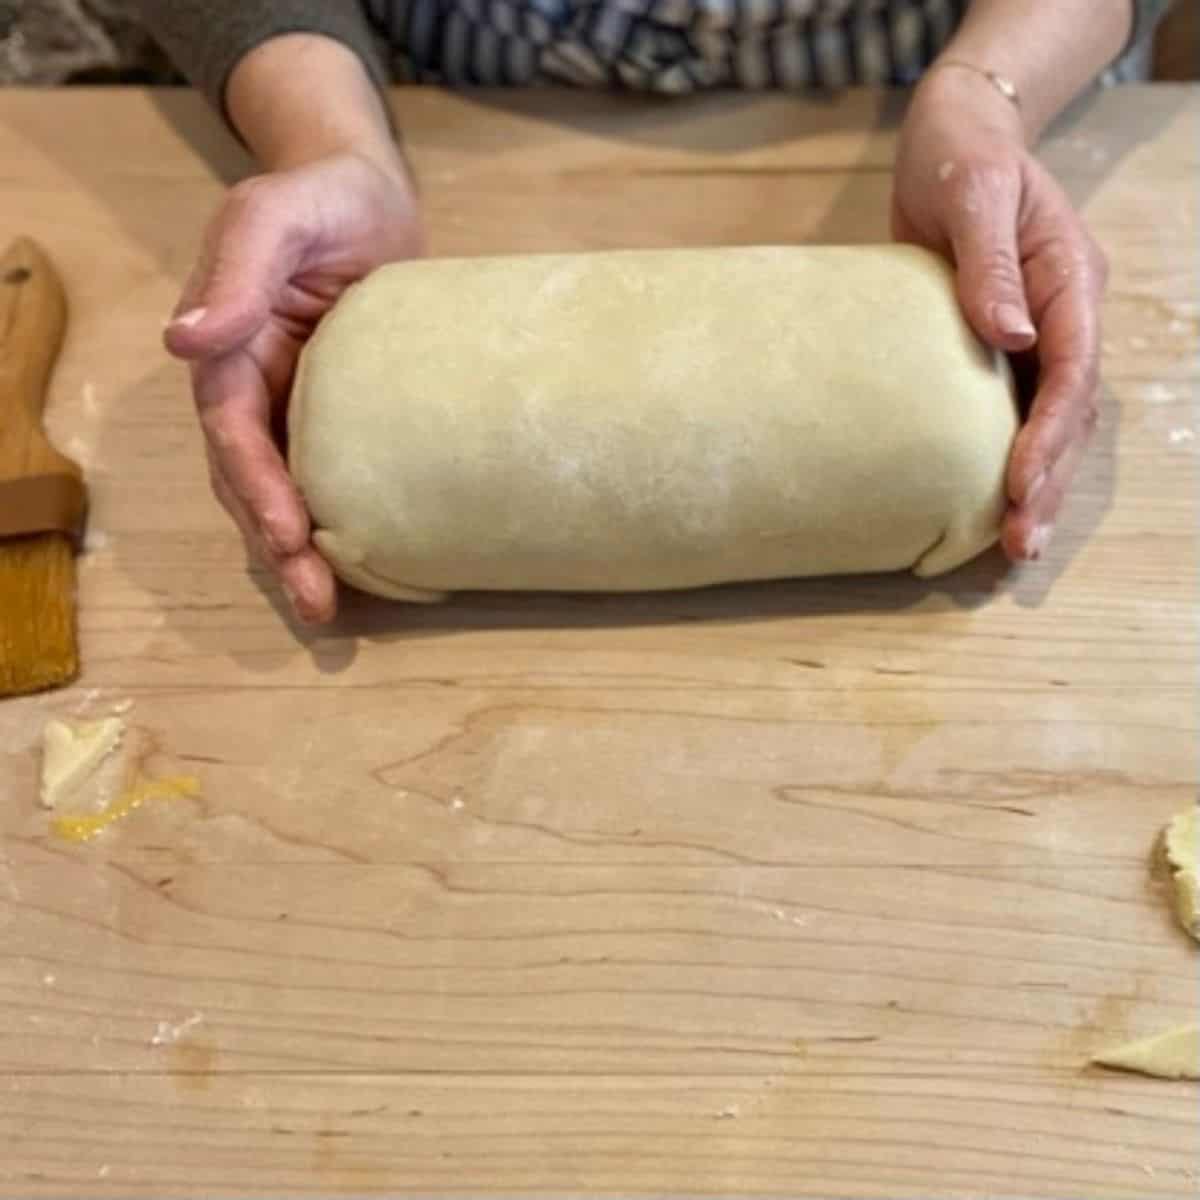
Now the Creative Part…Make It Pretty!
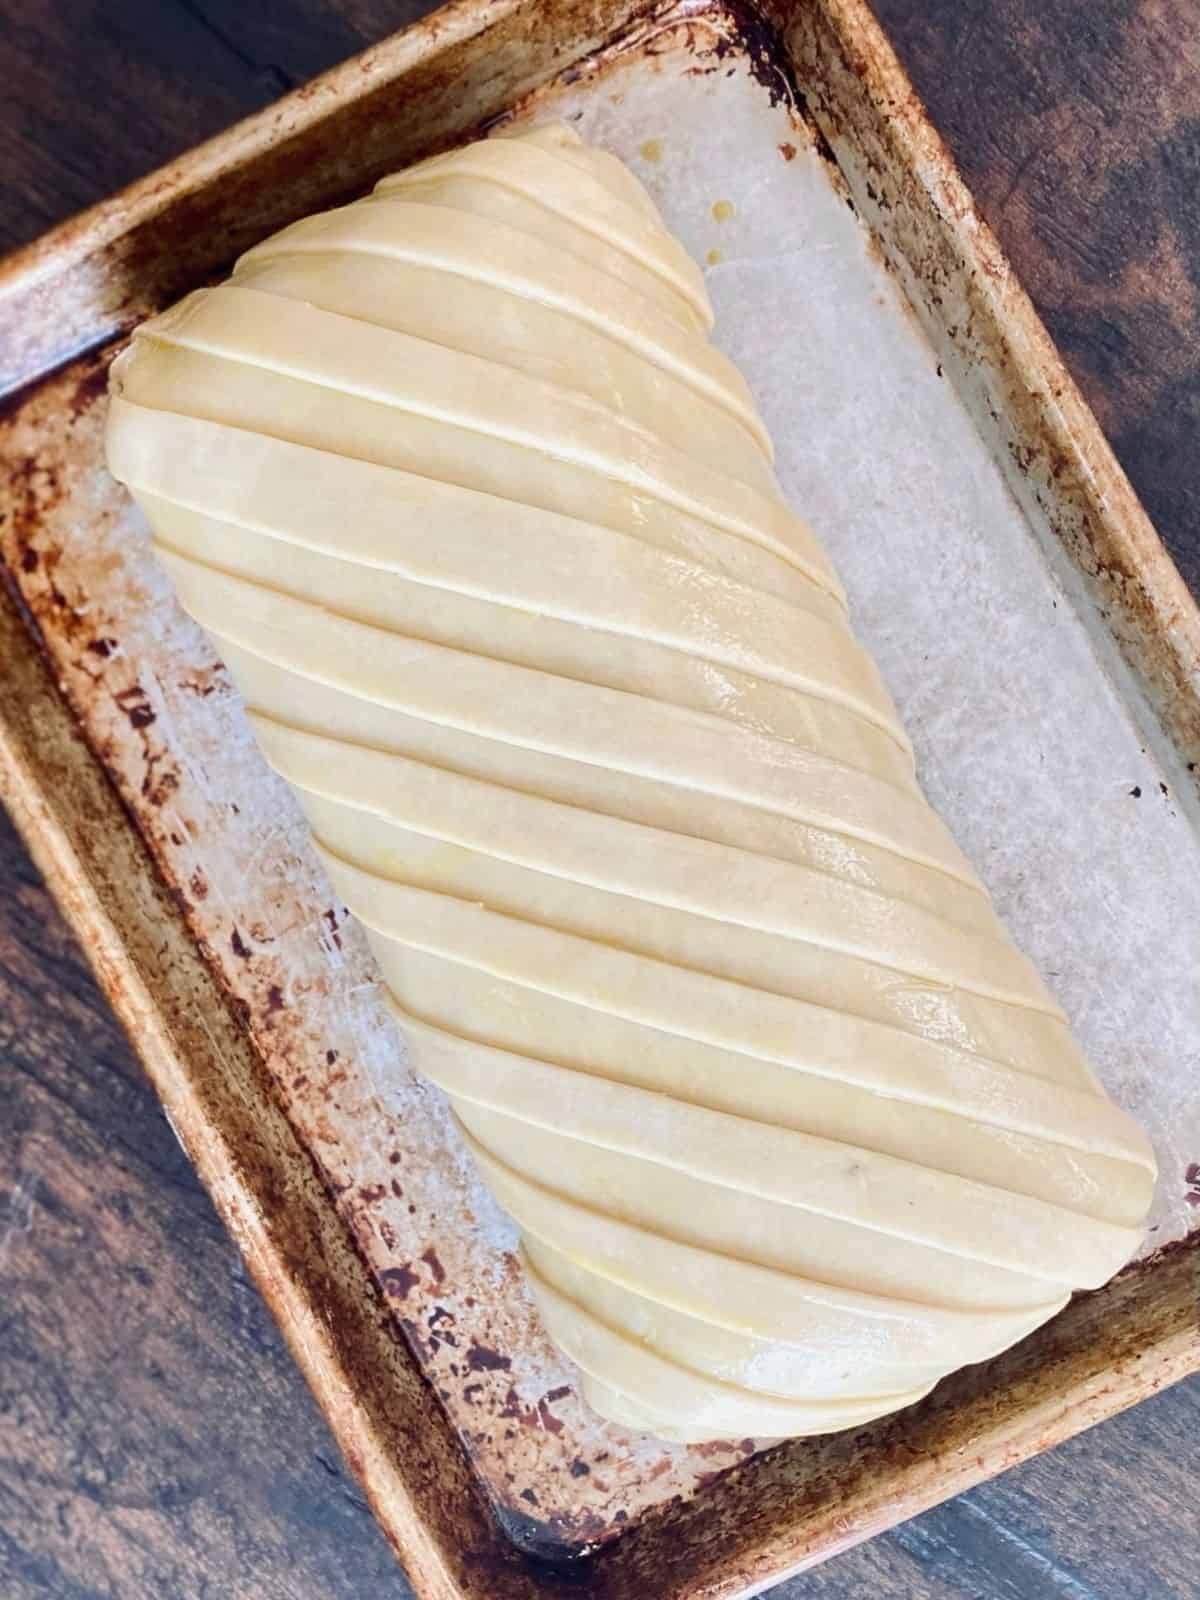
Here’s where you can get creative! Roll out that second piece of dough to 1/4″ thick and decorate your Wellington.
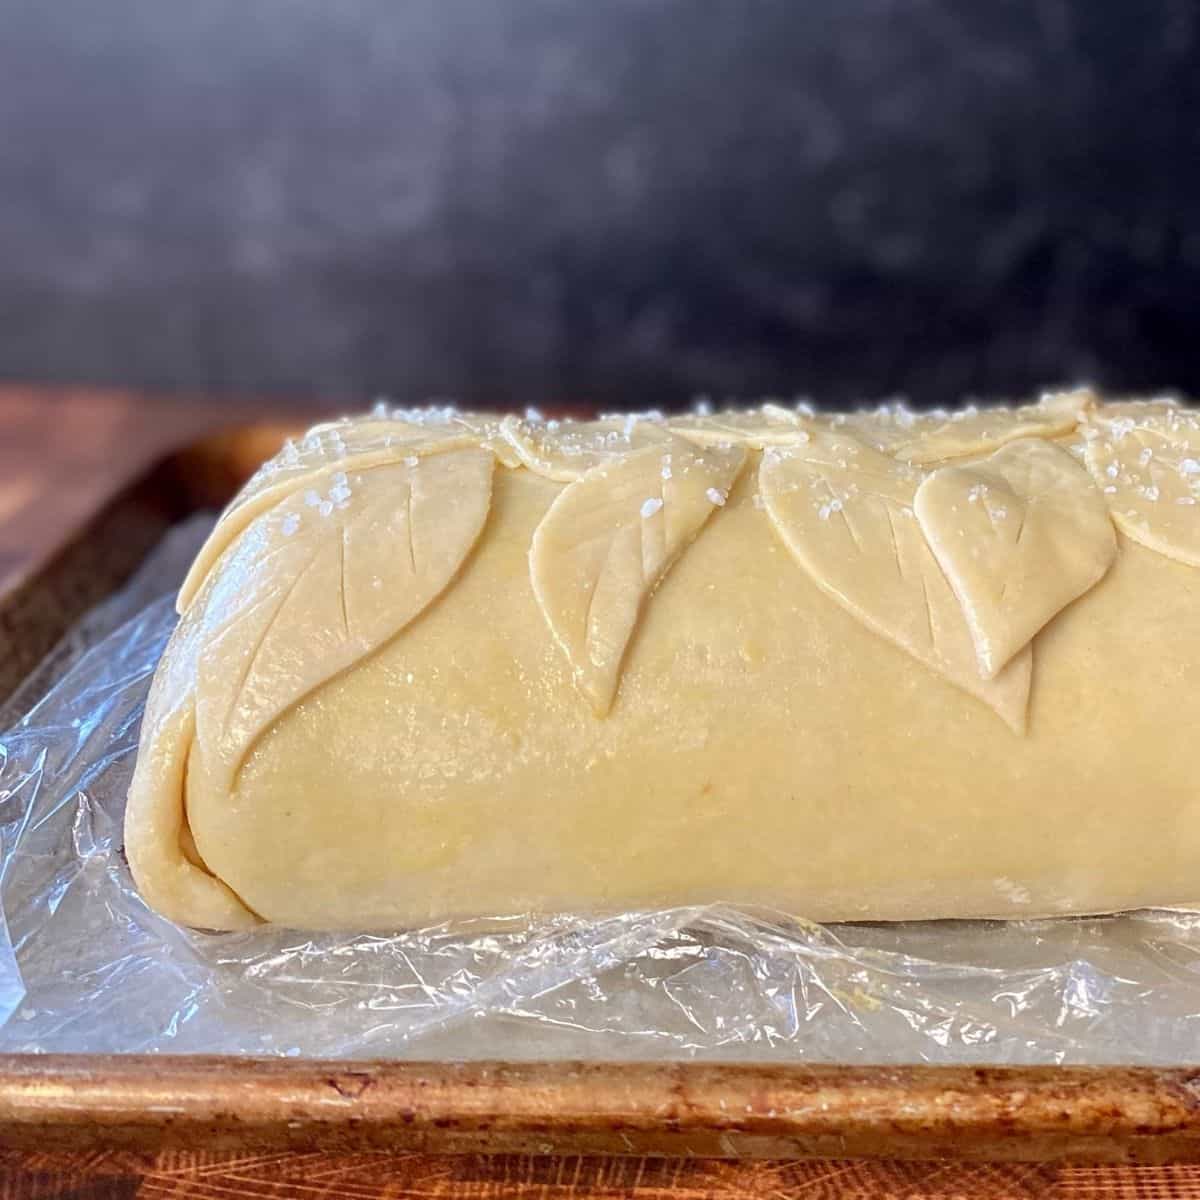
I like cutting leaves and placing over the top, but you can do anything you like at this point. You can go freehand or use cookie cutters. Cooks Illustrated’s version used strips to lay across the top and I like the way that looks, too. Just brush an egg wash over the entire thing, lay your design on top and brush with egg wash again. Voila!

At this point place your wellington on a rimmed baking sheet and chill for 20 minutes before covering with plastic wrap. You can chill it for 24 hours before baking. If you’re doing this the same day you plan to cook it, I suggest chilling for at least 2 hours so that the beef is completely chilled all the way through.
What About The Sauce?
Ohhhhh….you’re gonna love this! The recipe I initially based this sauce on called for Madeira but I had my eye on Eric’s whiskey collection, and from there the sauce just kind of told me what it wanted to be. You can make the bourbon cream sauce early in the day, too (probably even the day before if you really want to get things out of the way). I used Elijah Craig Bourbon, but you can use whatever you have on hand.
Here’s what you’ll need:
- butter
- capers
- shallot
- flour
- beef broth
- bourbon (or whisky of preference)
- grainy mustard
- heavy cream
Have you thought about what you’ll serve along side?
My recommendation is to keep it simple.
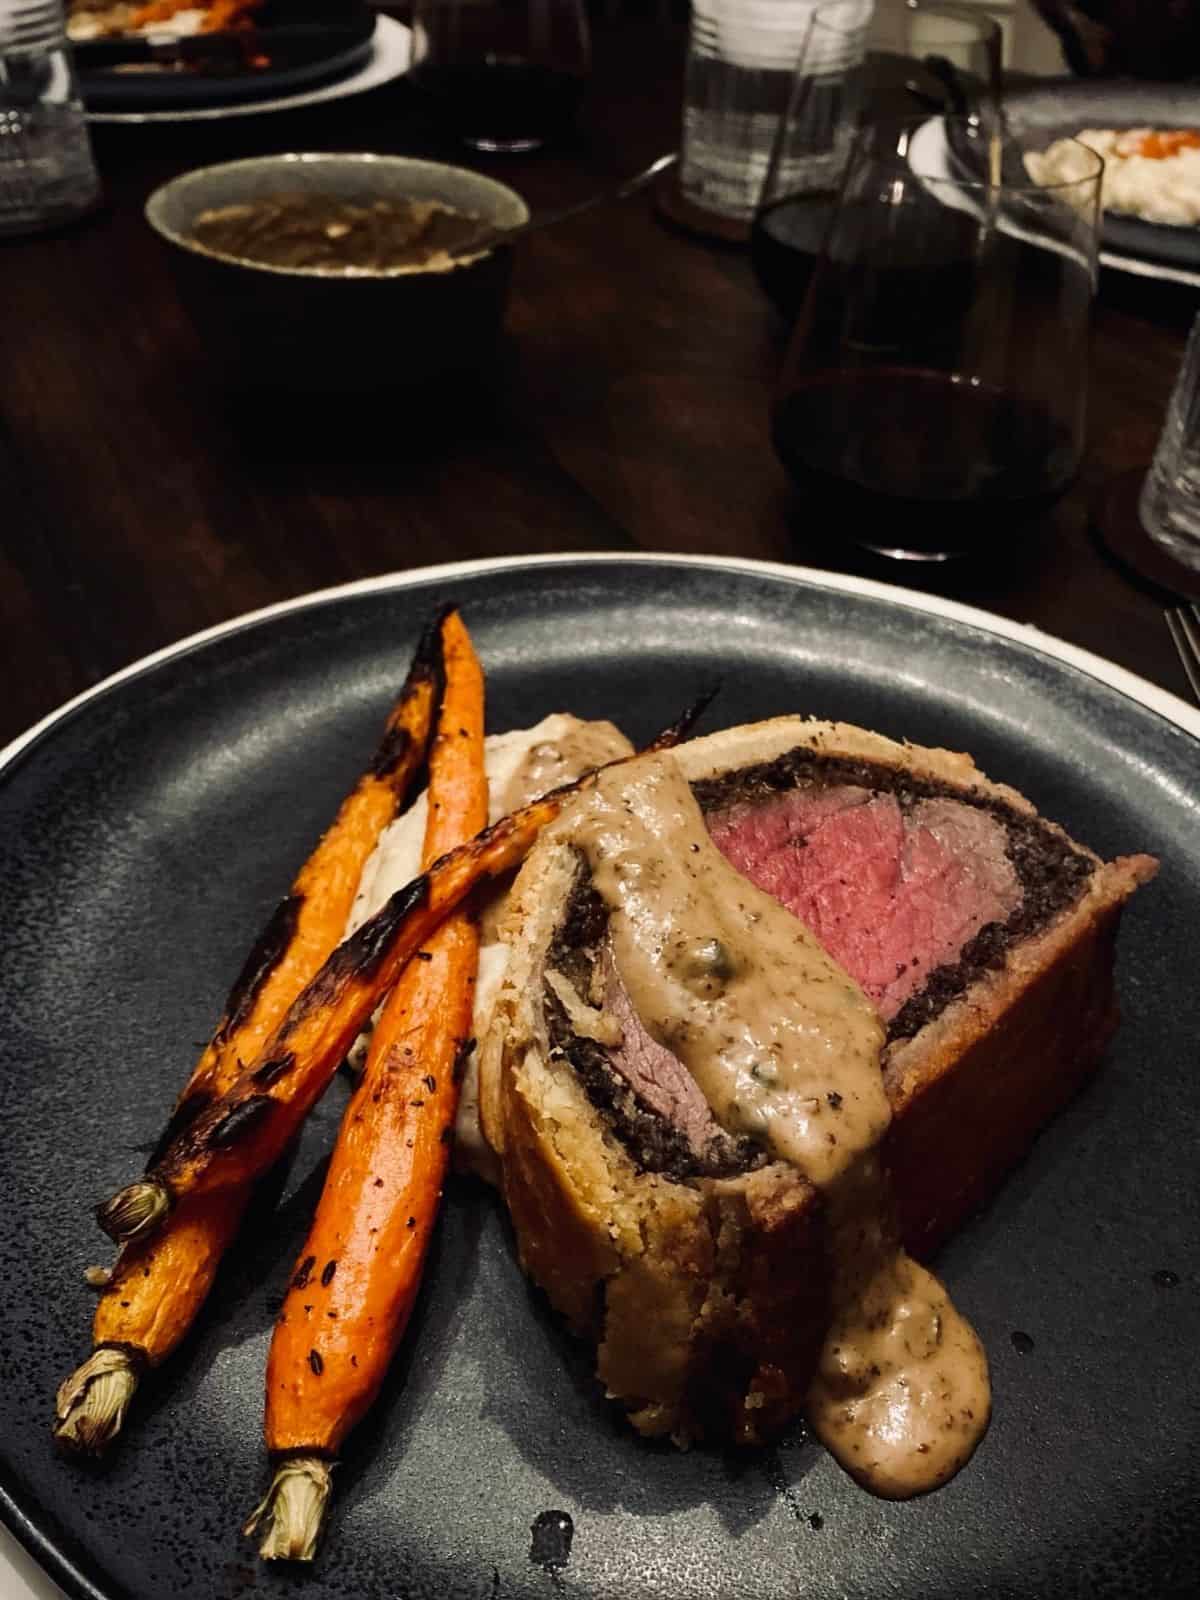
Beef Wellington begs for a creamy bed of mashed potatoes and a simple vegetable. That’s really all you need because the Wellington itself is so gorgeous and full of flavor that you really want it to shine!
For this dinner with our friends, Jim & Erika, I decided on mashed potatoes and roasted carrots. Neither of the men are fans of truffle (whaa-whaaat???) but Erika & I are, so I swirled some minced truffle into ours and we enjoyed all of their earthy deliciousness. If you like truffle, it’s a fantastic compliment (you can use truffle salt or a drizzle of truffle oil, too).
Ready To Bake???
One More Thing Before You Pop It In The Oven
Brush the top lightly with egg wash again and sprinkle some coarse sea salt over. I love the look and the little crunch it provides.
Trust the method
Beef Wellington should be medium rare and rosy with a beautiful dark pink center so when I tried this method for the first time I really struggled to believe that it wouldn’t end up overcooked. PLEASE TRUST THE METHOD. And use a meat thermometer!!!!! If you chill the Wellington ahead, preheat the oven, use a meat thermometer, take it out at 85 degrees and let it rest the full amount of time (I know it seems like a long time for med-rare…again…trust me) IT WILL BE PERFECT.
So perfect (happy sigh)…
A Long Rest Before Carving Is Key
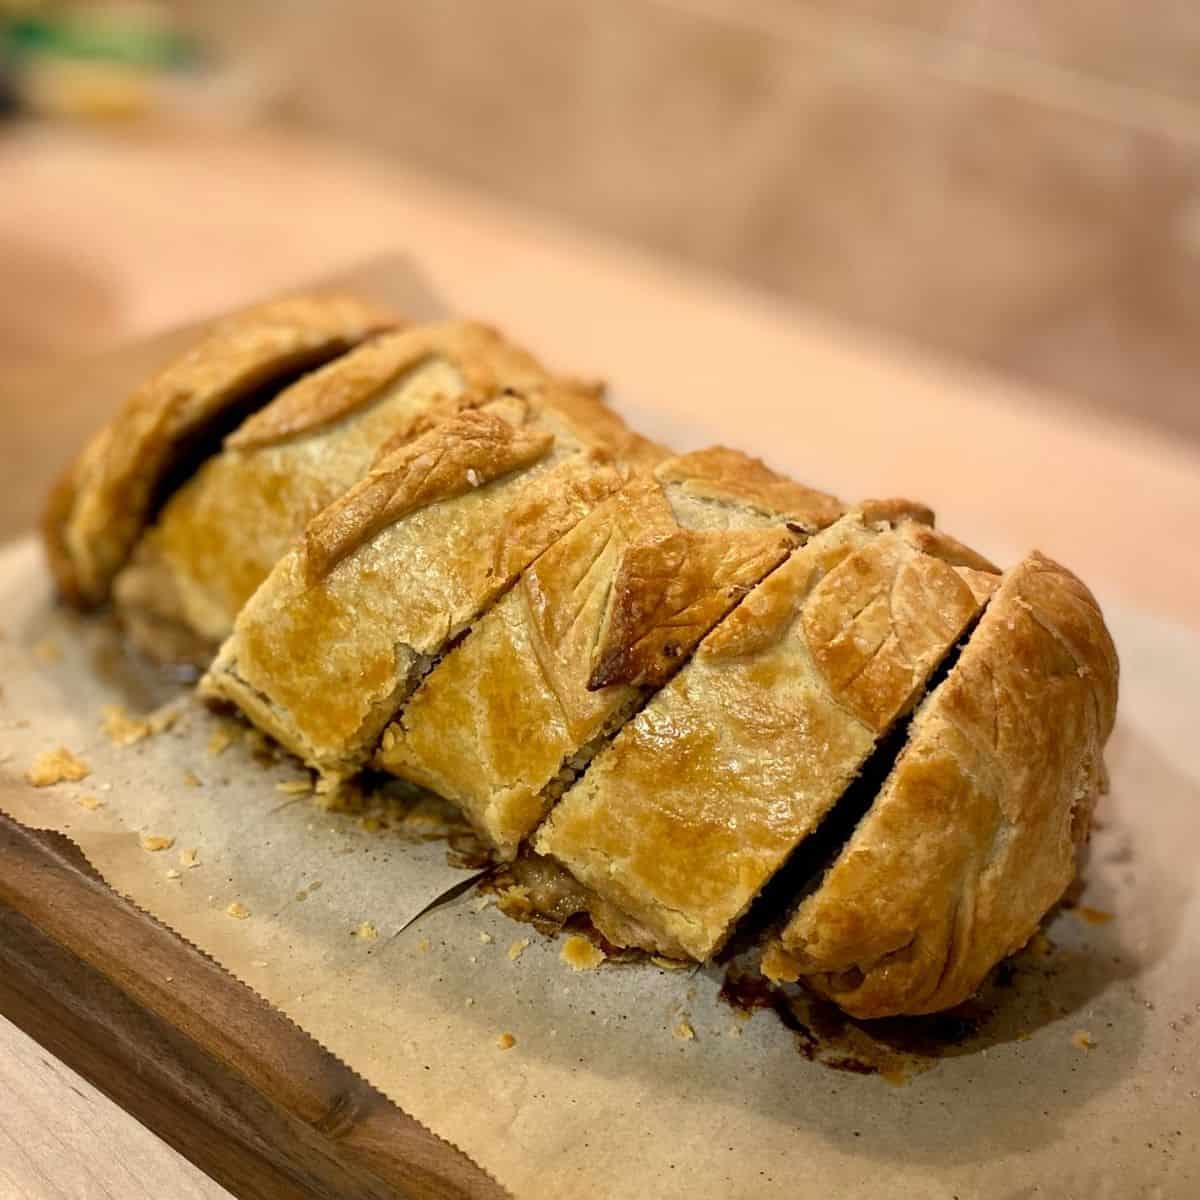
This recipe calls for roasting your Wellington at 450 for 40-45 minutes and pulling it out of the oven when the internal temperature is 85 degrees and the pastry is crisp and golden. You’ll allow it to rest for 40-45 minutes. The residual cooking that happens during this long rest brings the temperature up to a beautiful 130 degree medium rare. Resting also allows all of the juices to flow back into the meat. Don’t skip this part but DO use a digital thermometer to monitor the temperature. When it’s 130 it’s ready to carve.
For the Wellington in these pictures the temp raised a little faster than I expected (or maybe I was really enjoying my friends and my wine and forgot to check. It happens) and so we carved it at 140. It was still delicious and it cut like butter. One of our friends preferred their beef a little more done, too, so it worked out perfectly. I wouldn’t recommend going any higher than that, though.
Eat Slowly & Savor Every Bite
Because the roast rests so long you’ll have plenty of time to make your sides, plate your food and pour some wine. Now you get to enjoy the reward for your beautifully executed masterpiece.
Slow down, breathe, toast your friends and admire the meal before you.
Savor every morsel of food. Every sip of wine. And every bit of conversation. Because THIS is what it’s all about 🙂
If you make this recipe I’d love to hear how it went and see your pictures! Tag me on instagram or leave a comment here!
Don’t forget to check out my How-To Guide for assembling your Beef Wellington!
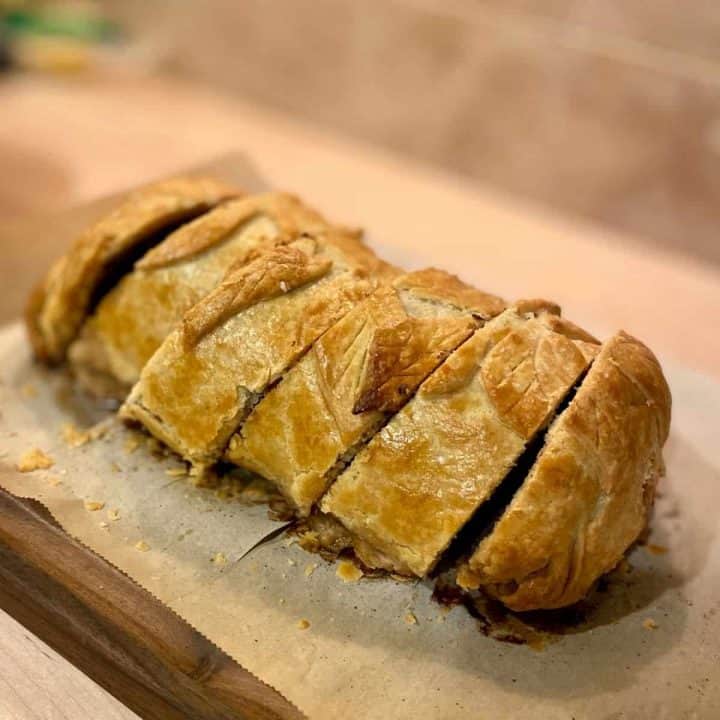
Beef Wellington with Caramelized Onions & Bourbon Cream Sauce
This Beef Wellington is the perfect size for four people & can be completely prepared ahead of time! Flakey homemade pastry wraps around perfectly cooked fillet, classic duxelles & caramelized onions & is served with a delicious bourbon cream sauce!
Ingredients
Beef
- 1 1/2- 1 3/4 lb center cut beef tenderloin roast, 4-4 1/2 inches in diameter
- 1 Tbsp Dijon mustard
- 1 tsp kosher salt
- cracked pepper
Pastry
- 1 2/3 cup (9 1/2 oz) all purpose flour (I used King Arthur)
- 11 Tbsp unsalted butter, cubed and chilled
- 1 1/4 tsp Diamond kosher salt (If using Mortons kosher reduce to 1 tsp, if using regular salt reduce to 1/2 tsp)
- 1/4 cup ice water
Duxelles
- 2 shallots, chopped fine
- 2 cloves garlic, peeled
- 1 lb mushrooms, trimmed & quartered (I've used mixed and baby bellas)
- 4 Tbsp butter
- cracked pepper
- 1/4 tsp Diamond kosher salt or a pinch regular salt
- 1 1/2 tsp bourbon
- 1 tsp fresh or 1/2 tsp dried thyme
Caramelized onions
- 1 large yellow onion, sliced (approx 1 1/2 cups sliced)
- 1 Tbsp unsalted butter
- 1/2 Tbsp olive oil
- 1/2 Tbsp whisky
Whisky Cream Sauce
- 1 Tbsp unsalted butter
- 1 Tbsp capers, rinsed and patted dry
- 1 Tbsp minced shallot
- 2 tsp flour
- 1 1/4 cup beef broth
- 3 Tbsp bourbon
- 2 tsp grainy mustard ( you could also use dijon)
- 1/2 cup heavy cream
For Assembly
- 13 thin slices prosciutto
- 1 egg
- Coarse sea salt, for sprinkling
Instructions
Three Days Before: Prep the beef & prepare the components
- Prep the beef: Sprinkle all sides of the beef with kosher salt, wrap tightly in plastic wrap and chill. If you're not spreading this over several days make sure you do this part at least 12 hours before you start assembling)
- Make the pastry: Cut the butter into cubes and chill until ready to make dough. In the bowl of your food processor fitted with metal blade, combine flour and salt and pulse twice. Add butter all at once and pulse off and on for 1 second intervals, just until butter is the size of peas. Add ice water all at once and process using short, quick pulses, just until it forms even crumbs and will hold together when you pinch a clump between your fingers. It will look very loose, do not over process. Dump it out onto a floured board and quickly, so that the heat of your hands doesn't melt the butter, gather the dough into a cohesive lump. It's good to be able to see flecks of butter in the dough. Pull of 1/4 of the dough, shape each chunk into a rectangle, wrap well and chill until ready to use.
- Make the duxelles: Put the mushrooms, shallots and garlic in a food processor fitted with the chopping blade. Pulse until finely chopped, scraping bowl as needed. The mushrooms and shallots should be in 1/8 inch pieces (the size of rice grains). Don't over-process (you do not want mush).
- Melt butter in a large skillet over medium heat. Add mushroom/shallot mixture, salt and pepper and cook, stirring often. When the mushrooms start to release their liquid, turn the heat to low and continue cooking, stirring occasionally, until you hear a low sizzle and the mixture looks dry. Turn up the heat and add the bourbon, stirring until evaporated. Remove from heat and let cool. Refrigerate until ready to use.
- Caramelize the onions: Halve your onion through the root end (discard root ends) and cut into slices about 1/8 inch thick. Melt butter and oil in skillet over medium heat and add onions. Stir to coat onions, turn heat to low and stir often until they're a rich, dark brown color. Don't rush this process, it should take a good 45 minutes or more to get to the caramel color you want. When they're nicely caramelized add the bourbon and cook just until evaporated. Season to taste with a little salt and cracked pepper. Remove to a bowl, cool, and chill until needed.
Two Days Before: Assemble the roast, part 1
- Assemble the beef and filling: unwrap the beef and pat dry with paper towels. Brush all sides with mustard and season with cracked pepper (you do not need any salt). Set aside.
- Lay two sheets of plastic wrap out on the counter, overlapping, to create a large rectangle about 20" x 20". Shingle the prosciutto slices in the center of the plastic wrap, slightly overlapping each other, in two rows of six with their long sides parallel to the edge of the counter (towards you). Spread the duxelles in a rectangle centered on the prosciutto as wide as your tenderloin and 14 inches long. If the duxelles are too cold to spread easily, microwave them for 30 seconds to loosen them up.
- Place the roast parallel to the counter on the top third of the duxelles. Spread the caramelized onions in a 3" strip on top of the duxelles 2" from the roast (this will ensure that the onions end up on the top of your roast when it's completely rolled up)
- Using the plastic wrap to help, use both hands to lift the prosciutto and filling over the roast from the far end, rolling and pulling the roast towards you. Continue rolling, pressing the filling to seal as you go and leaving the plastic wrap behind until roast is completely wrapped. Pay attention to where the onions are as you roll so that when you're finished you can position the roast with the onions on top.
- Press the ends of prosciutto in to completely seal and check for any gaps or tears. You don't want filling leaking out while it roasts so tear off little pieces of your extra slice of prosciutto and use them as "patches" .
- wrap the whole thing in plastic wrap, sealing tightly and smoothing to a nice, snug cylinder with your hands. Chill for at least 1 hour or up to 2 days before roasting.
The Day Before: Wrap roast in pastry
- On floured counter roll out the large piece of dough to a rectangle approximately 12x14" with the short side parallel to the counter (towards you).
- Whisk egg and brush over the entire sheet. Use bench scraper to make sure dough isn't sticking to the counter. Dust counter with a little extra flour if it is.
- Unwrap chilled beef and place on the dough, long side parallel to the edge of the counter, top (caramelized onion side) down, about 4" from the edge of dough closest to you. Lift the dough closest to you over the roast, pressing it gently to seal, and start rolling the roast away from you using both hands and pressing and sealing as you go until the roast is completely covered and top is facing up. You should have overlap on the bottom of the roast by a couple inches.
- Turn the roast over and allow a 1" overlap, trimming the excess. Press to seal and turn roast back over so that the seam is on the bottom.
- To seal the ends use your hands to gently smooth the dough down over the edge, pressing it snugly against the beef but not pulling tight enough to tear it. Use a rolling pin to roll the excess dough away from the roast to seal it and make it thinner. Trim the rolled ends to 2", roll roast seam side down, fold ends back using egg wash to seal against bottom of roast.
- Turn over again so that the seam is down. Smooth with your hands and place on a lined baking sheet to chill.
- Roll out smaller rectangle of dough 1/4 inch thick on floured counter and cut decorative shapes freehand or using cookie cutters. Bring out chilled roast, brush with remaining egg wash, and lay pastry cutouts decoratively over.
- Brush cutouts with egg wash and sprinkle a little coarse sea salt over the top. Place roast in refrigerator loosely covered with plastic wrap for at least one hour and up to 24 hours ahead.
The Day Of: Prepare sauce and cook Wellington
- Preheat oven to 450 and make sure oven rack is in the lower-middle position. If using an oven safe thermometer (recommended) insert it through one end so that the probe is in the very center of the roast.
- Place roast, on rimmed baking sheet, in oven directly from refrigerator and roast 40-45 minutes, until center registers 85 degrees f and the pastry is crisp and golden.
- Place roast, still on sheet, on wire rack and let rest uncovered for 40-45 minutes or until temperature raises to 130 degrees (135-140 if you like it a little more done, but no higher than that or it will be overcooked)
Sauce can be made while roast is resting or earlier in the day:
- In a medium saucepan melt butter over medium low heat and sauté capers and shallot until shallot is soft but not brown, about 2 minutes, stirring constantly
- Add in flour and stir for 1 minute
- Increase heat to medium and whisk in beef broth, bourbon and mustard. Bring to a boil and continue cooking until reduced to 3/4 cup, about 10-12 minutes.
- Add cream, reduce to a simmer, and continue cooking and stirring until thickened slightly and reduced to 1 cup
- Season with kosher salt and cracked pepper to taste
Use a serrated knife in order to keep pastry intact and for a neat presentation. Serve slices with sauce. Enjoy!


Leave a Reply