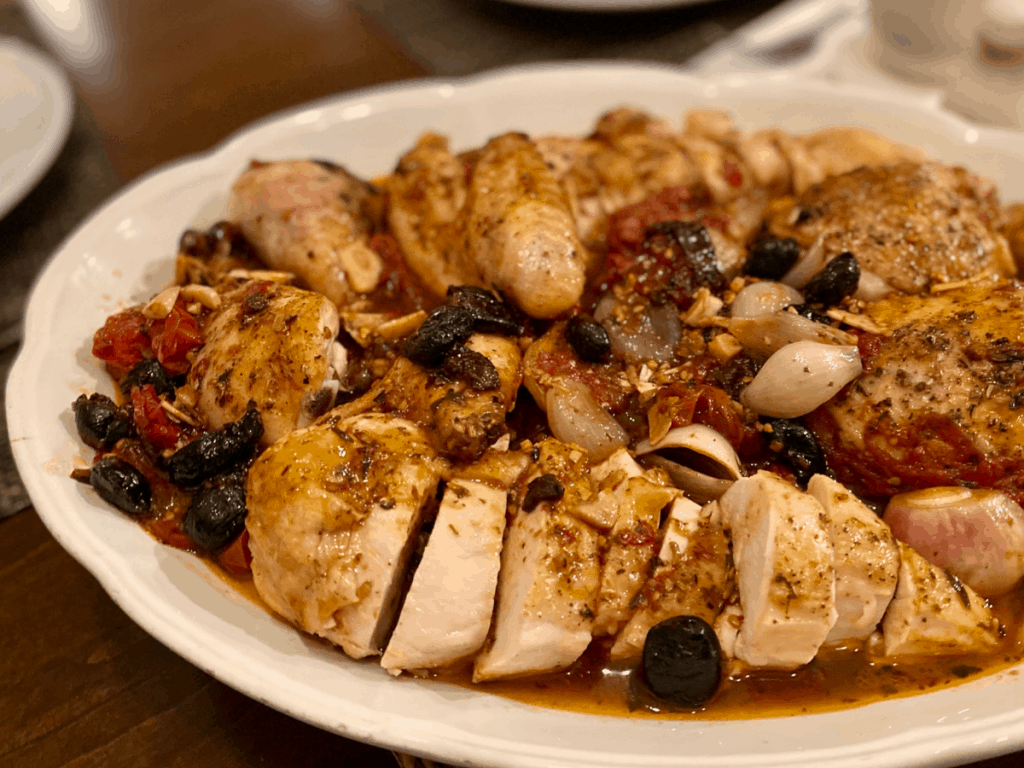
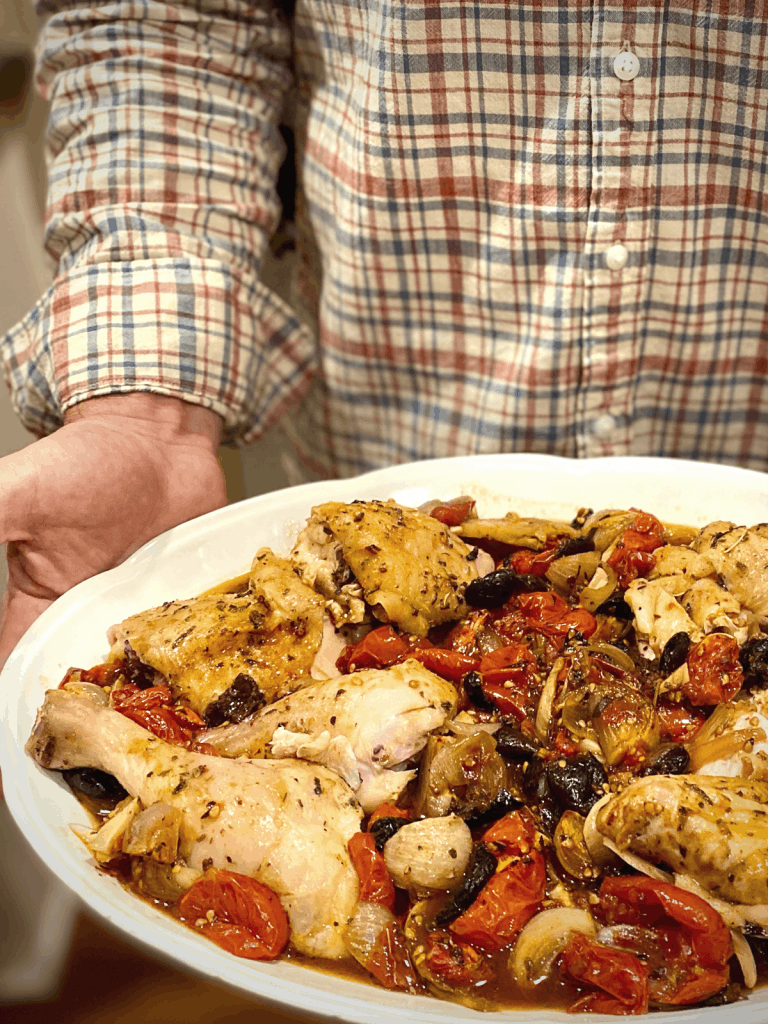
My version of Chicken Provencal is based on the classic French dish and delivers the juiciest braised chicken bathed in the bold flavors of olives, tomatoes, shallots, herbs and wine. This is company-worthy comfort food but I don’t hesitate to make it just for us, either. Served with some crusty bread to sop up the sauce, a simple vegetable and a nice glass of wine it’s perfect for a Tuesday night in or a special occasion with friends!
The first thing we’re going to do is break a rule…
I debated whether or not I could call this a braise because I don’t brown the chicken first. It’s probably nerdy that I’ve spent as much time as I have debating this in my head. But you know what? Cooking is therapeutic and relaxing and ultimately a creative expression. So I’m just going to go ahead and continue calling this a braise. I’ve never really been one for following the rules anyway.
And maybe you’re a rule-breaker, too 🙂
In my first post on braised short-ribs with ricotta gnocchi I explained that braising is the process of browning larger, tougher cuts of meat first and then cooking them low and slow partially covered in flavorful liquid. It’s truly my favorite way to cook because it fills your house with wonderful smells, gives the flavors time to develop and results in really juicy, fall-apart meat.
Braised Chicken Provencal will give you all of those things. Good smells, tons of flavor and the juiciest chicken PLUS a super easy bonus recipe for pasta using the leftovers (if there are any)! We’re just skipping the browning step.
First things first…have you ever spatchcocked a chicken?
Before you think I’m getting too personal let me explain what spatchcocking is (in case this is the first time you’ve heard the term). Spatchcocking is a way of preparing a chicken (or any poultry) by removing the backbone so that you can lay it flat in one piece to cook.
Why spatchcock?
Well, there are LOTS of reasons and after you’ve done it once you’ll wonder why you haven’t done it before:
- First, it’s fun to say 😉
- It also helps the light and dark meat get done at the same time. Ever roast a chicken the conventional way and by the time the dark meat is cooked through, the breast is dry and flavorless? When the breast is directly exposed to the heat in your oven and the thighs (which need to reach a higher temperature) are underneath it only makes sense that by the time the dark meat’s done the breasts are overcooked. Laying the bird out flat with the breasts “insulated” by the thighs helps everything to cook evenly.
- Spatchcocking results in really juicy meat AND a shorter total cook time.
- When you roast a spatchcocked chicken the skin will get extra crispy because ALL of the flesh is directly exposed to the heat. That won’t happen in this recipe because of the braising liquid, but it WILL happen for a roasted spatchcocked bird (which I’ll be posting soon).
- The easiest carving ever. Transfering the chicken from roasting pan to carving board is so much easier with a flat bird. And carving it? THE BEST. Everything is laying flat already. Get a good, heavy knife and cut down the center to separate the halves. Locate where the thigh meets the breast and cut in between to separate. Find that spot between the joints of the drumstick and the thigh and press through. Cut each breast in half (I like to leave the little wing joint attached) OR remove the breast from the bone and slice into 1″ thick sections. You’ll love how the knife just slides right through.
Spatchocking is as easy as 1-2-3:
After you’ve done it once it’s a pretty quick process. Up until recently I just used my chefs knife for this but I finally decided to buy a pair of kitchen shears a few months ago. Woah, life changing. This is so much easier with kitchen shears and now I wonder why I waited so long to buy a pair! If you don’t have them put them on your wish list, mine were only $20 and I use them all the time now.
How to Spatchcock a chicken
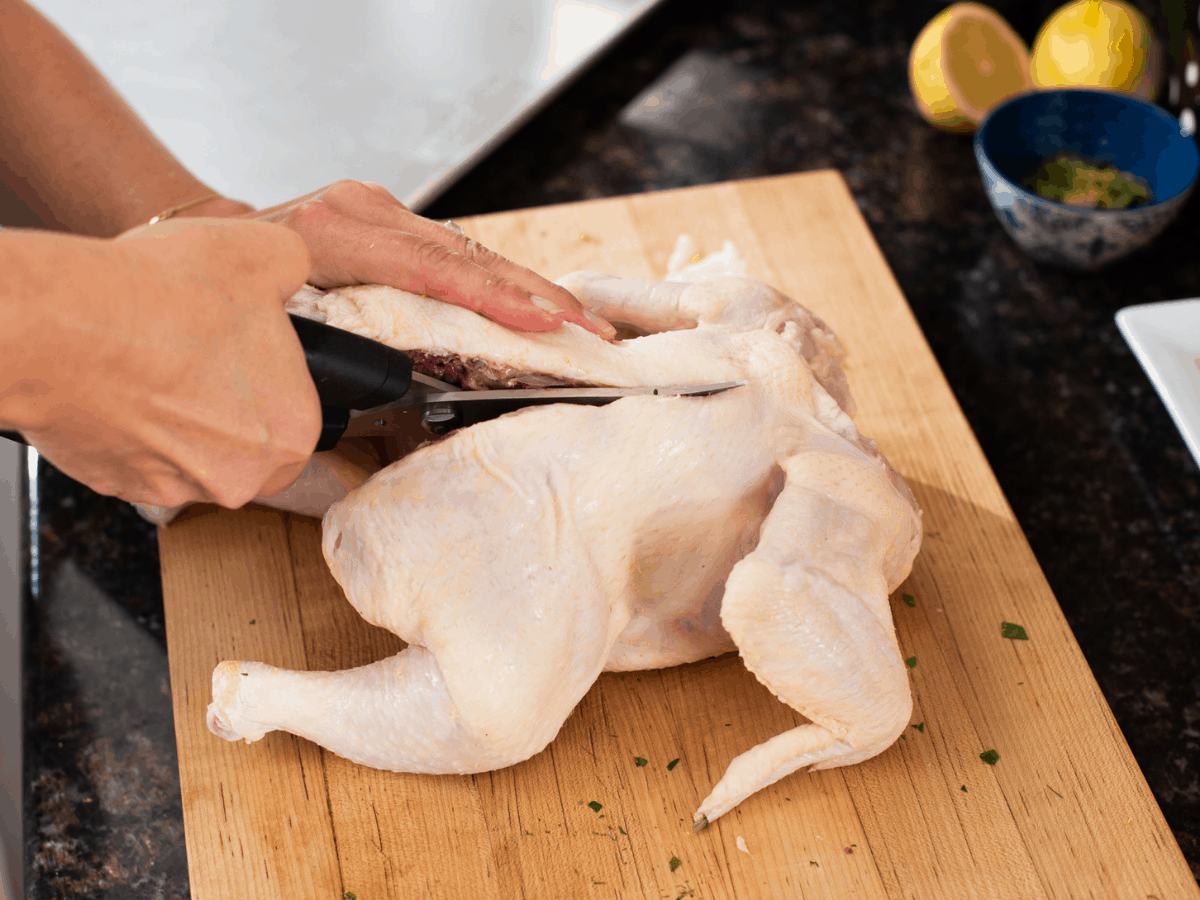
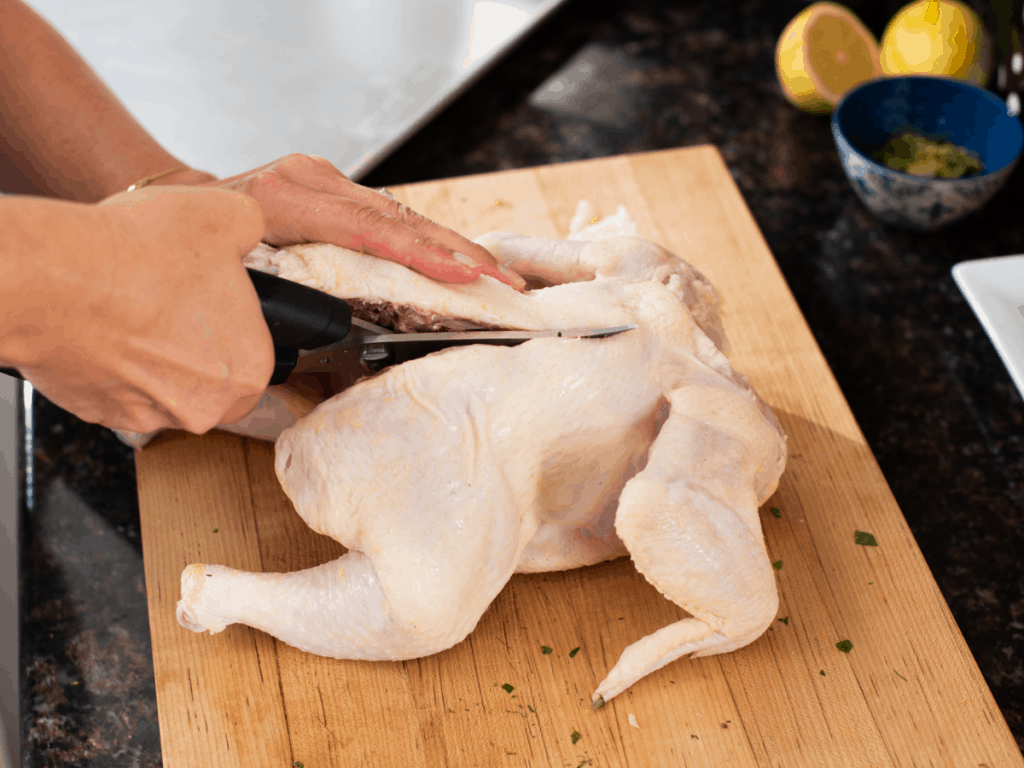
- Lay your bird on a flat surface breast side down, legs towards you. Take your shears (or chefs knife) and cut along both sides of the backbone to remove it. The backbone is only a couple of inches wide, make sure you’re not removing the thigh meat along with it (because that’s the best part of the chicken, IMO).
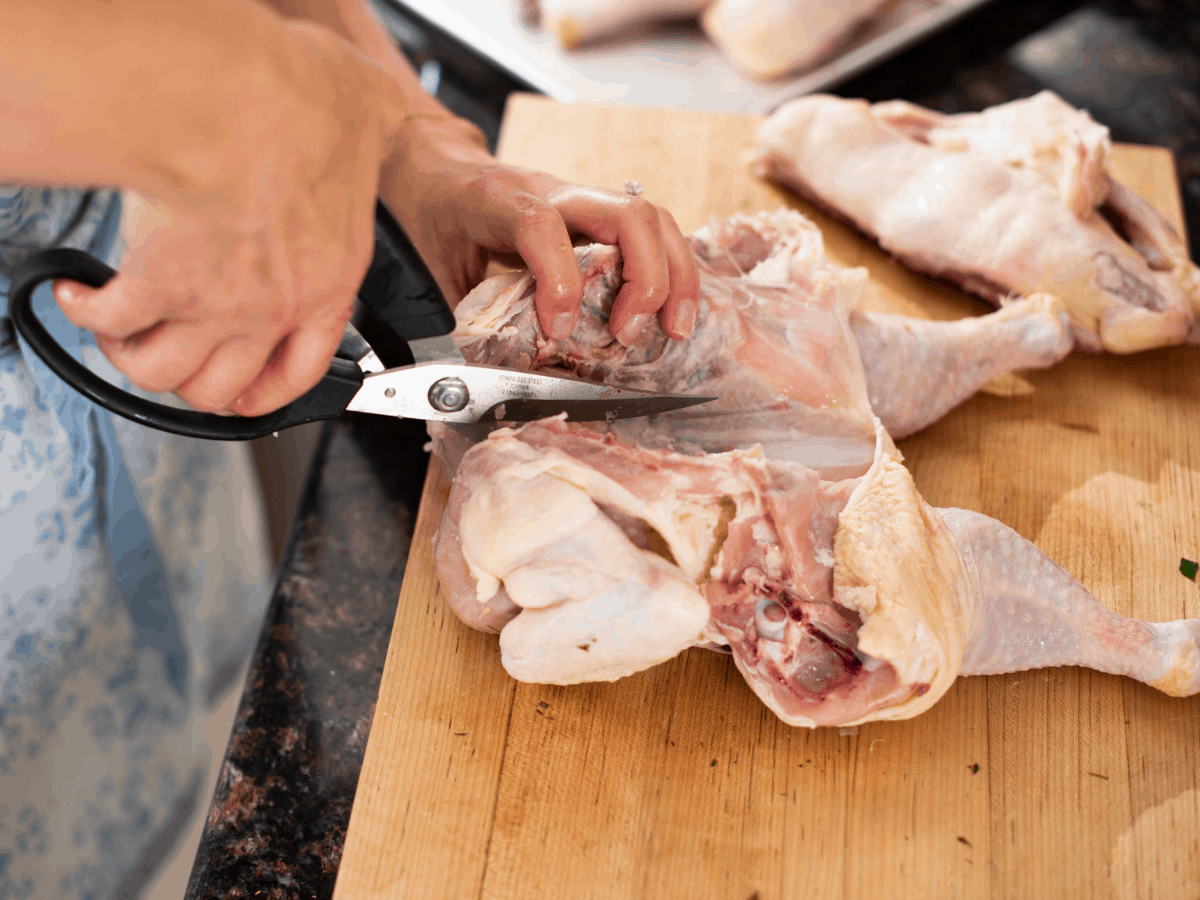
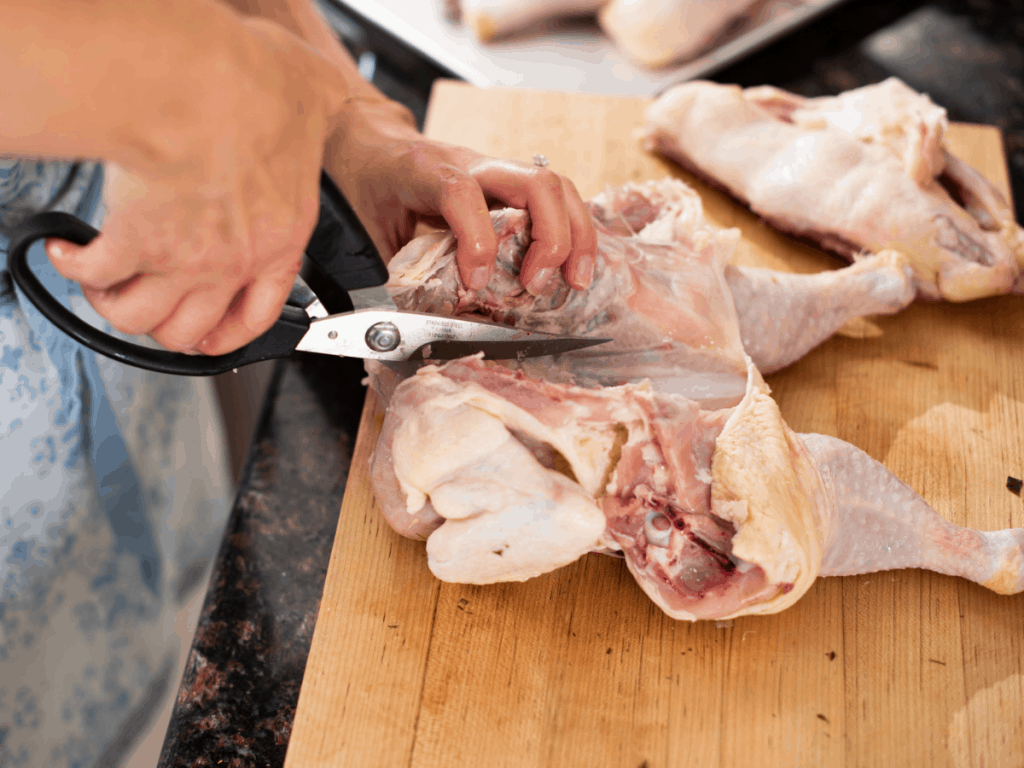
- Turn the bird around so that the legs are pointing away from you and make a snip about 2″ long between the breastbones. This will make it easier for the chicken to lay flat.
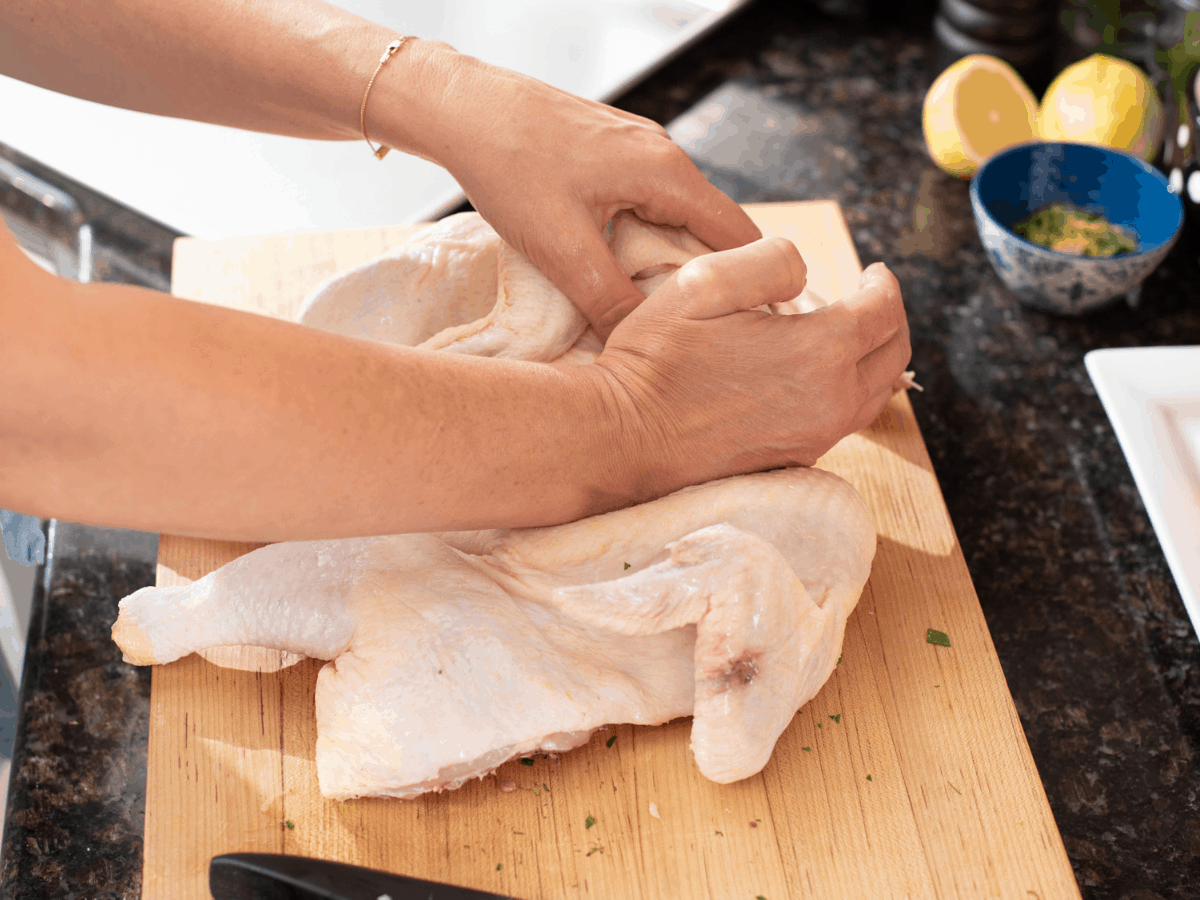
- Turn the chicken over so that the skin side is facing up and use the heel of your hand to press down between the breasts to flatten the chicken.
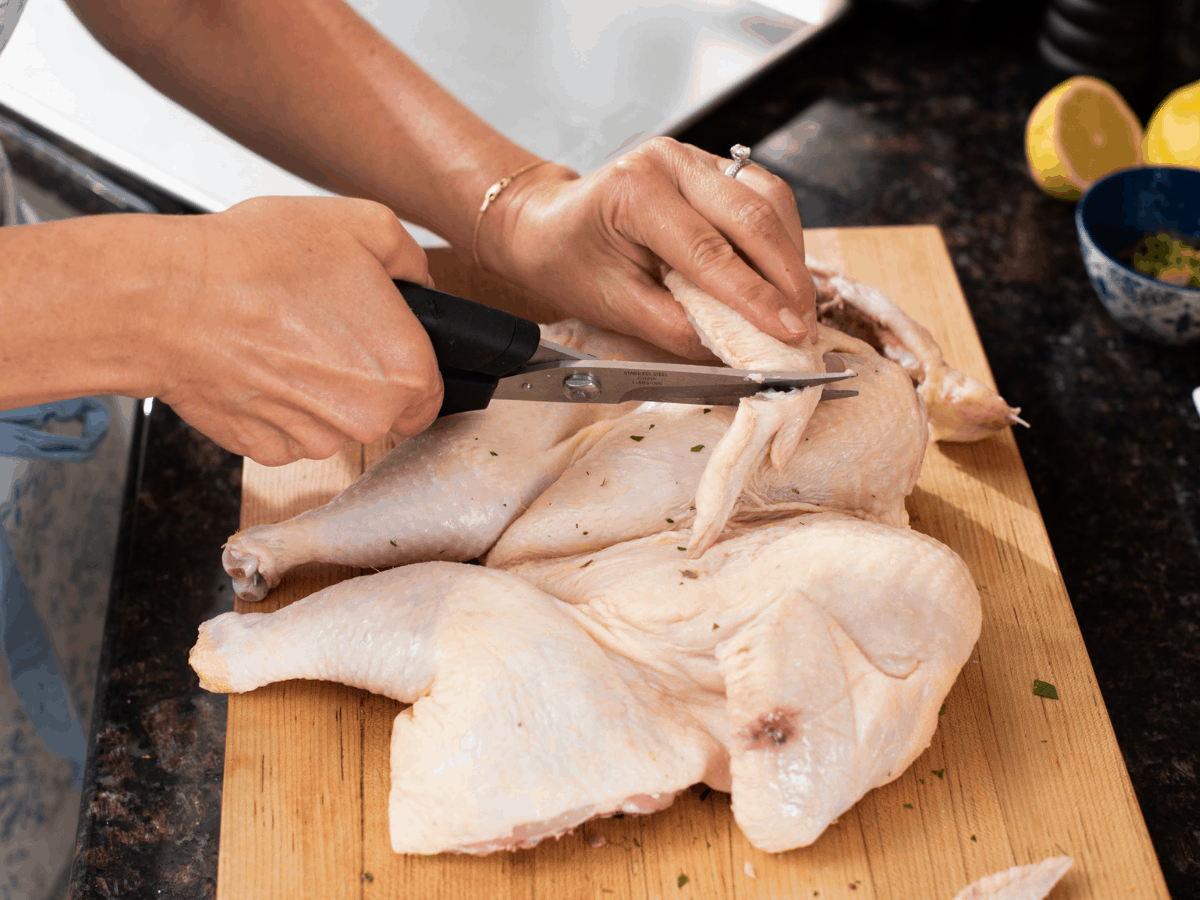
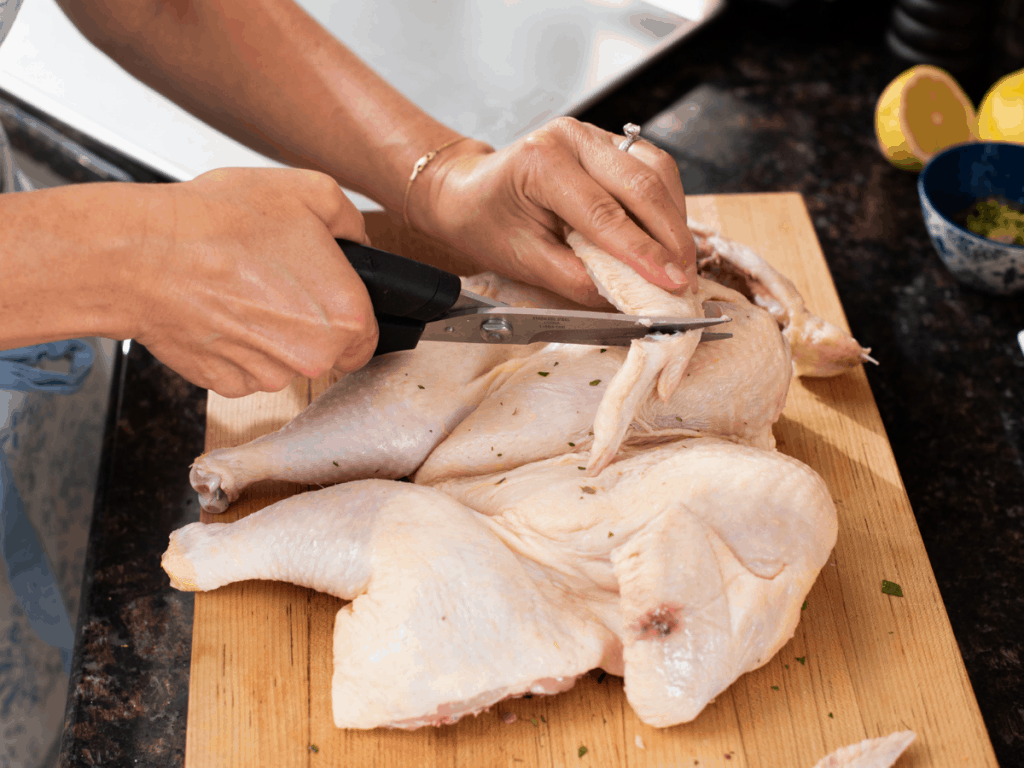
- I snip off the tips of the wings and put them in a freezer bag with the backbone to make stock later.
You’ve just spatchcocked a chicken- how easy was that?!
Things I love but Eric hates
Radishes (because they “taste like dirt”), beets (because they “taste like dirt”), arugula (because it “tastes like dirt”), olives (because they’re olives and “even though they don’t taste like dirt they’re awful” and people should never eat them).
We almost had our first fight the second time I made this for him…
Why? Because I genuinely believed he would realize he likes olives if he Just. Ate. One. I sat across the dinner table from him and talked about how these olives were different and how a person’s taste changes every 7 years and finally if he just took one teeny tiny taste I wouldn’t ask him to try another olive for at least 7 more years.
I guess I crossed a line. He just wanted to enjoy his dinner without being guilted (or bullied?) into trying a food he knew he didn’t like. He loves this dinner -despite the olives- and is perfectly willing to pick them out and give them to me. I suppose I should be grateful for extra olives on my plate. But I pushed and he dug his heels in deeper and now I think he will most likely NEVER try an olive again and it’s my fault. But I learned something…
Eric is the second most stubborn person I know and I love him for it 🙂 (even if that means we’ll never enjoy an arugula salad with roasted beets, radishes and olives together)
Back to the recipe, let’s build some flavor!
Once you’ve prepped your chicken drizzle it with some of the olive oil, sprinkle it with some of the herbs de provence, a good amount of kosher salt and a few nice cranks of cracked pepper. Rub it all in and set your chicken aside. You can do this the day before (which is my preference if I plan ahead) and refrigerate your seasoned bird overnight. The extra time will allow the seasoning to get nice and deep into the meat which will result in a super flavorful bird.
Whether or not you’ve seasoned ahead make sure your chicken has been sitting at room temperature for an hour before you put it in the oven.
If you cook straight from the refrigerator the outside is going to get dry before the inside is completely cooked. This is a good tip to keep in mind any time you’ll be cooking meat.
For the rest of the ingredients:
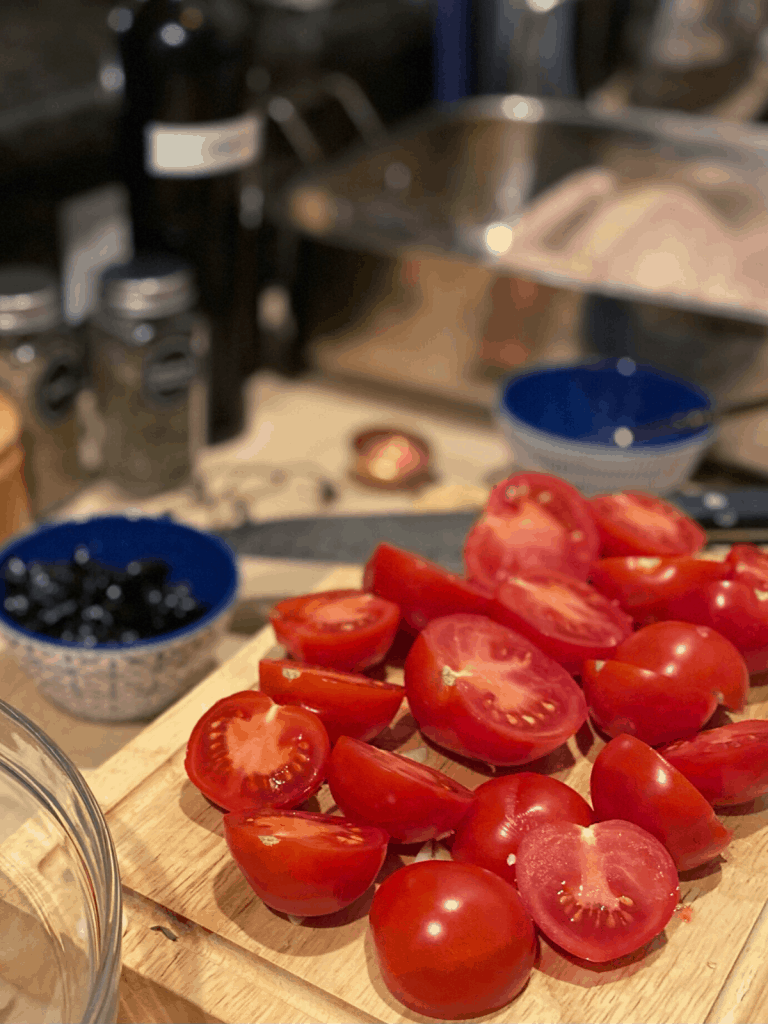
- I like to use either plum/Roma tomatoes or cocktail tomatoes for this. Slicing tomatoes don’t have the flavor or the meatiness need to make this dish really stand out.
- Shallots have become another favorite ingredient of mine over the years. They’re smaller and milder than onions and add a really beautiful flavor here. Either quarter them or cut them into 6 wedges each so that they get nice and soft while they cook.
- You’ll want to use pitted kalamata olives or, my favorite, oil cured black olives. You can find the latter in the olive bar if your grocery store has one.
- Herbs de Provence is a blend worth having on hand and is perfect here. I also use it in my fillet cheesesteak with melty peppers on brioche. Herbs de Provence is a blend of rosemary, thyme, savory, marjoram, lavender, fennel and bay leaf. Use a combination of thyme, rosemary and bay leaf if you don’t have it on hand.
- The sliced fennel is completely optional but adds a really nice touch. Hannah was here for dinner the last time I made this and brought half of a bulb she had left in her fridge. We threw it in and I think it’s something I’ll do from now on.
Getting it ready for the oven
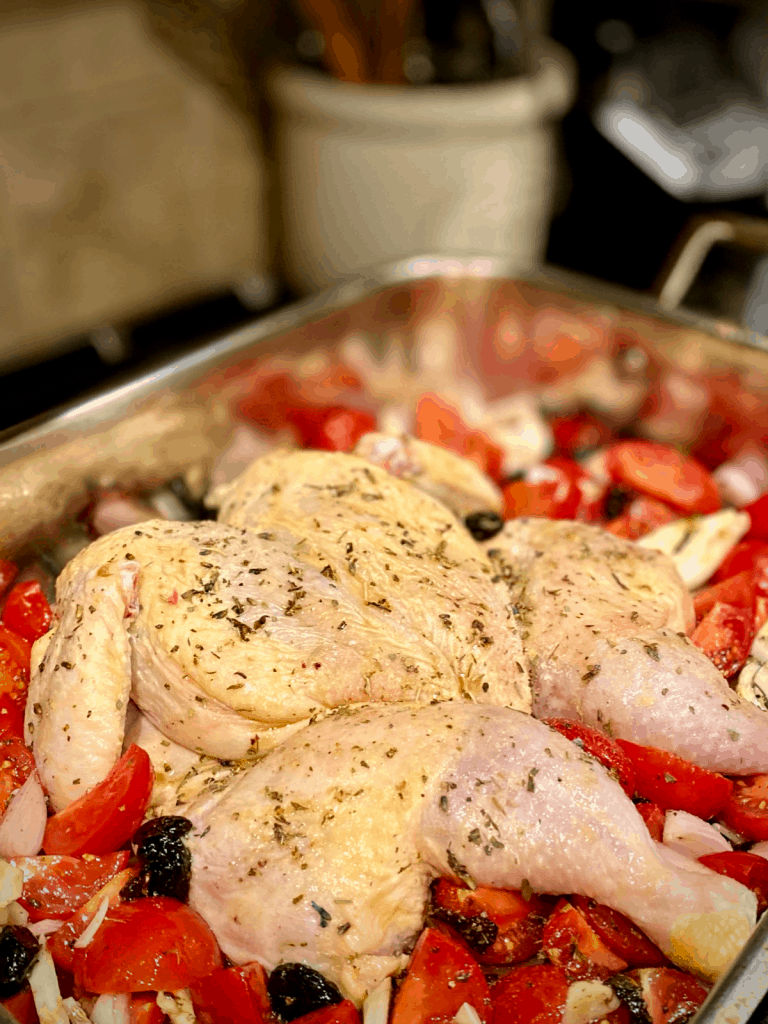
Now you’ll combine the tomatoes, shallots, olives, garlic and fennel (if using) with the remaining olive oil and herbs. Do this right in the same pan you’ll be cooking the chicken in. Push your veggies to the sides of the pan. Place your chicken in the middle and pour the wine and chicken broth over the veggies. Pop it in the oven. Soon you’ll be enjoying all of the wonderful braised chicken smells wafting through the house.
One last thing- you want to have a reliable meat thermometer available. I give times and temps in the recipe but variables like the size and starting temperature of your chicken and the accuracy of your oven make a difference in how long it will ultimately take. Take it out and check after an hour of cooking and don’t leave the oven door open while you’re checking. Or, better yet, get an in-oven meat thermometer. You’ll take it out when the thickest part of the thigh (not touching the bone) registers 165 degrees f. Let it rest on a carving board, tented with foil, for 15 minutes before carving. The temperature will continue to increase (to 170) while it stands and the juices will have time to flow back into the meat. Please don’t skip this part and you’ll be rewarded with beautifully cooked, perfectly juicy chicken!
Oh! And remember I mentioned leftovers earlier?
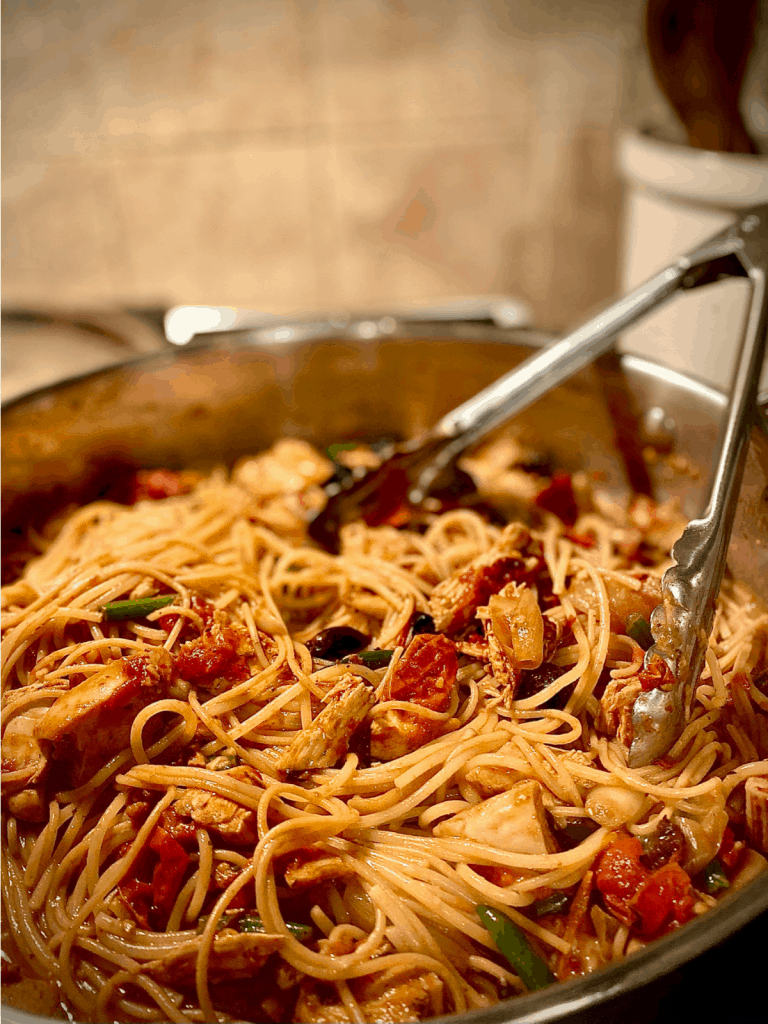
If you don’t eat this all the first night, the leftovers make a fantastic pasta.
- Pull the chicken from the bones. Cut into bite size pieces and put in a pan with the remaining sauce and veggies.
- Heat it gently and add a little chicken broth and a little cream. Not a lot, just enough (depending on how much you have left) to make a little sauce.
- Stir until warmed all the way through.
- Cook some pasta, drain and transfer directly into the pan with the chicken mixture.
- Stir everything around over low heat for a minute or two, sprinkle with parmesan if you’re feeling it and enjoy!
I hope you enjoy this Braised Chicken Provencal as much as we do!
And if you make it I’d love to see how it turns out! Tag #breathingandcooking on Instagram or facebook with a picture!
Braised Chicken Provencal
Ingredients
- 1 whole chicken, 4 lbs, spatchcocked (directions below)
- 1 1/2 lbs fresh tomatoes (I suggest plum, Roma or cocktail tomatoes)
- 6 shallots, cut into 6 wedges each
- 1/2 cup pitted kalamata or black oil cured olives
- 1/2 bulb fennel, sliced (optional)
- 4 large garlic cloves, sliced thinly
- 4 Tbsp olive oil, divided
- 2 1/2 tsp herbs de provence, divided
- 1/2 cup white wine
- 1/2 cup chicken stock
- 1 1/2 tsp kosher salt, divided
- cracked pepper
Instructions
First you want to spatchcock your chicken (step by step photos are in notes). Using kitchen shears or a good knife remove the backbone by turning chicken breast side down on a cutting board and slicing along each side of the backbone to remove it. Make a small snip at the top of the chicken where the breast bones connect. Flip the chicken over and, using the heel of your hand, press between the breasts to flatten the bird. I like to snip off the wing tips as well.
(Save the backbone and wingtips in a freezer bag for stock!)
- Rub the chicken with 1 Tbsp of the olive oil and sprinkle with 1 tsp herbs de provence, 1/2 tsp of the kosher salt and a few cranks of cracked pepper. You can do this up to a day ahead but make sure that you let the seasoned bird stand at room temperature for an hour before cooking it.
- In a large roasting pan or casserole toss together tomatoes, shallots, garlic, fennel (if using), olives, remaining 3 Tbsp oil, remaining 1 1/2 tsp herbs de provence, 1 tsp kosher salt and cracked pepper until all is coated well.
- Push vegetables away from the center of the pan to make room for the chicken. Lay your seasoned, spatchcocked chicken in the center. Pour the wine and broth around the pan over the vegetables.
- Place chicken and vegetables, uncovered, in the 425 degree f oven for 30 minutes. After 30 minutes reduce temperature to 350 and continue roasting 30-45 minutes more.
- Check the temperature after the second 30 minutes by inserting an instant read thermometer into the thickest part of the thigh. Depending on the size of the chicken it may take another 15 minutes. You want to take it out when the internal thigh temperature is 165.
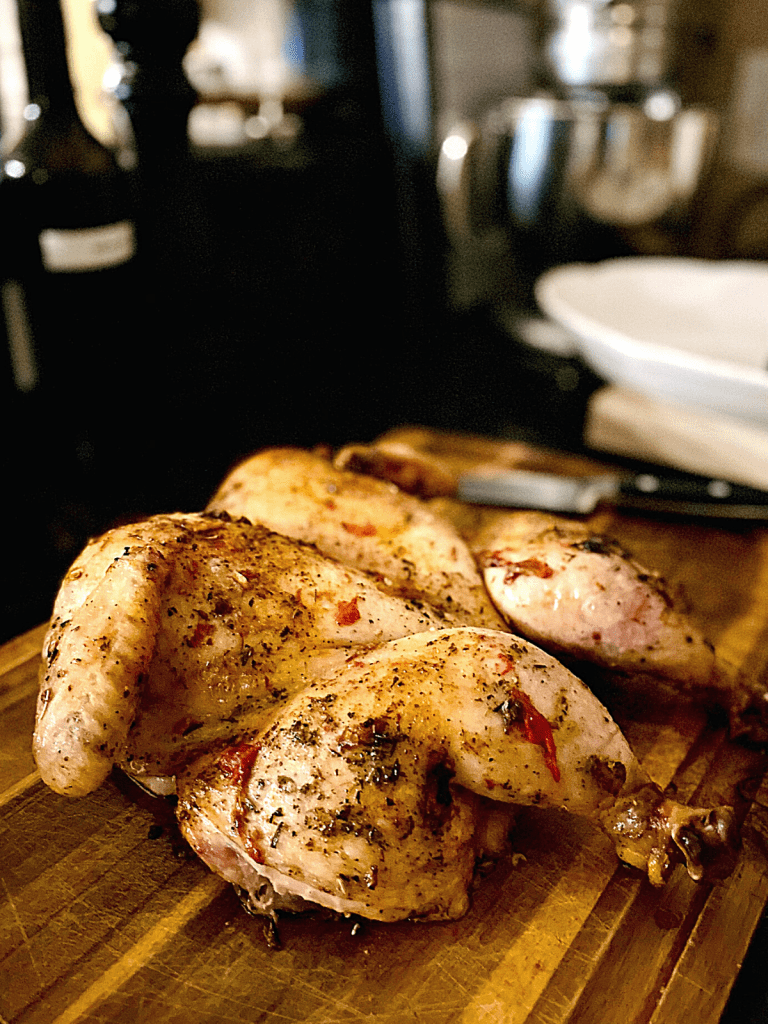
- When thigh reads 165 remove the chicken to a large carving board and tent with foil. Let it rest 15 minutes before carving (This is very important. Resting allows the juices to flow back into the bird keeping the meat juicy and also allows for the residual cooking that will bring the chicken to 170)
- While chicken rests return the pan with veggies to the oven to continue cooking.
- After 15 minutes the internal thigh temperature should be 170. Remove the vegetables from the oven and keep warm while you carve your chicken (this will be SO much easier since your chicken is spatchcocked!)
- Arrange chicken on a large platter surrounded by tomato/olive mixture.
- Enjoy!!
Notes
- Spatchcocking the chicken allows for a shorter cooking time and for the thighs to cook through without the breast drying out because all of the flesh is exposed to the heat. If you don't spatchcock the chicken the time and temperatures given in this recipe will not work.
- How to spatchcock a chicken: Lay chicken breast down on cutting board and use kitchen shears to cut along both sides of backbone making sure to leave thigh meat intact (you'll be removing an approximately 2" section)
- Turn chicken over and make a small snip through the bone connecting the breasts (this will make it easier for the chicken to lay flat)
- Flip chicken back over so it's skin side up and use the heel of your hand to push down between the breasts to flatten.
- Now use the shears to snip off the tips of the wings.
You've spatchcocked a chicken! Make sure to save the parts you removed in a bag in your freezer to make stock!
- Letting the chicken come to room temp before cooking is important for cooking time, a cold chicken takes longer AND makes it more likely the breast will dry out before the dark meat is done.
- Resting, covered, also allows for residual cooking. The temperature should rise by about 5 degrees during this time, bringing your final temperature to 170 before you carve the bird.
- When checking the temperature of the chicken remove the pan quickly to the top of the stove and shut the oven door so that you don't lose heat.


Leave a Reply